Select Point
The Select Point item type allows students to place a single “X” marker on an image. This format is ideal for location-based tasks, visual identification, or spatial reasoning. Students do not see any predefined hotspot areas—their job is to determine the correct location and click accordingly. Select Point supports auto-scoring.
Behind the scenes, authors define invisible hotspots on the image to determine which student clicks are considered correct.
Key Characteristics
- Students place a single “X” mark anywhere on the image.
- Authors define one or more invisible hotspots that count as correct if clicked.
- Hotspots can be circular or rectangular.
- Only one response is allowed per student.
- Students don't see the hotspot—they only see the image and where they’ve clicked.
- Multiple correct regions can be defined to allow scoring flexibility.
Instructional Connection
Select Point items are ideal for assessing spatial reasoning and visual identification in subjects like geography, science, or environmental education. Students are asked to interpret a diagram, map, or image and identify a precise location—reinforcing close observation and conceptual understanding. The absence of visible hotspot indicators makes this item type more challenging, as students must rely on their own knowledge rather than cues. This positions Select Point as a more open-response style of item, requiring students to independently analyze and apply what they’ve learned.
Authoring a Select Point Question
From the item editor:
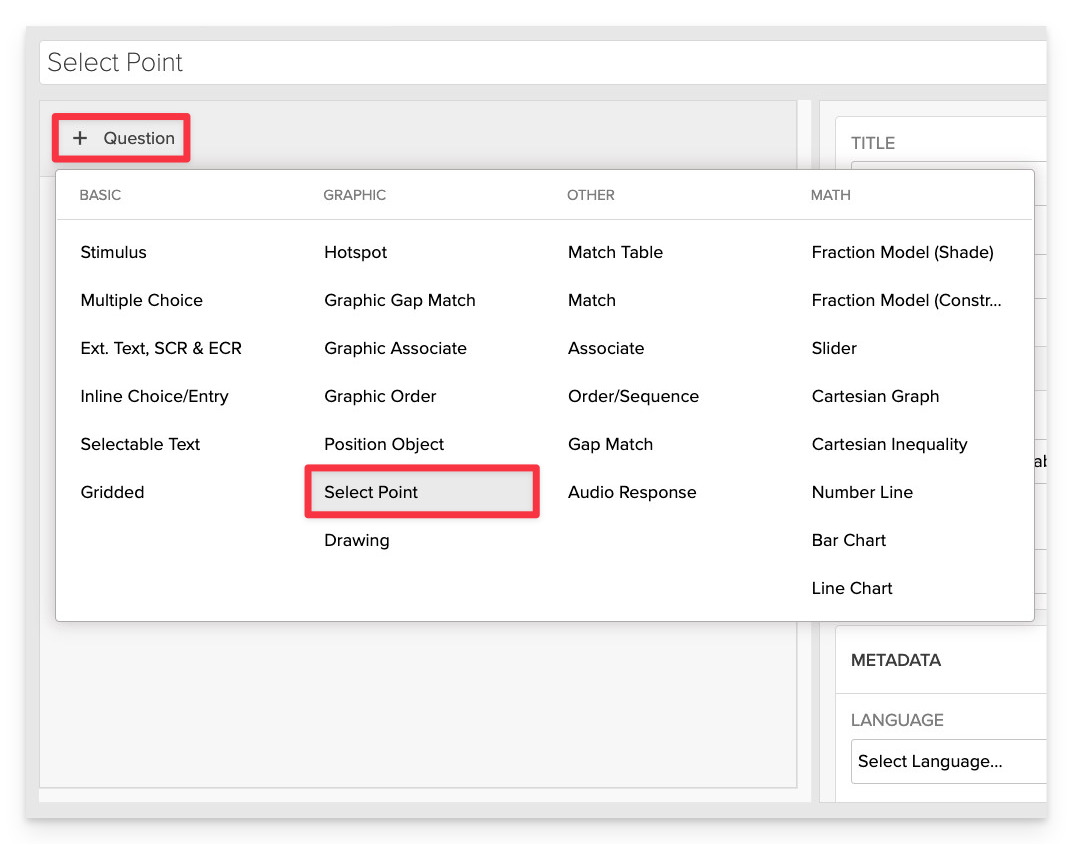
- Click on +Question.
- From the list of question types, select Select Point.
Enter the Prompt
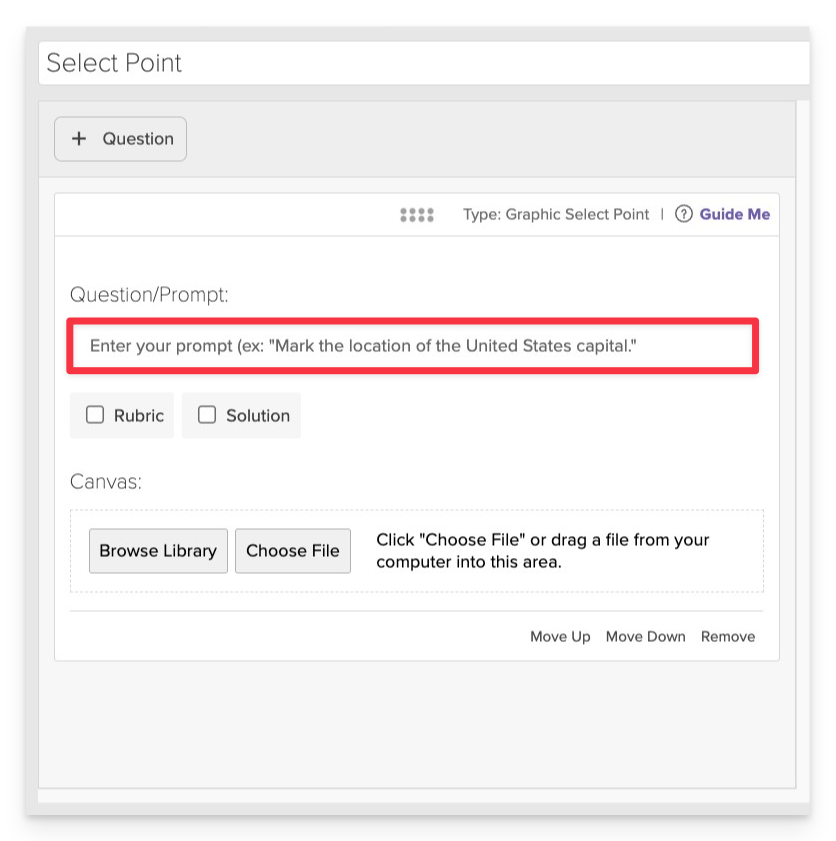
In the Prompt field, provide clear instructions for the student.
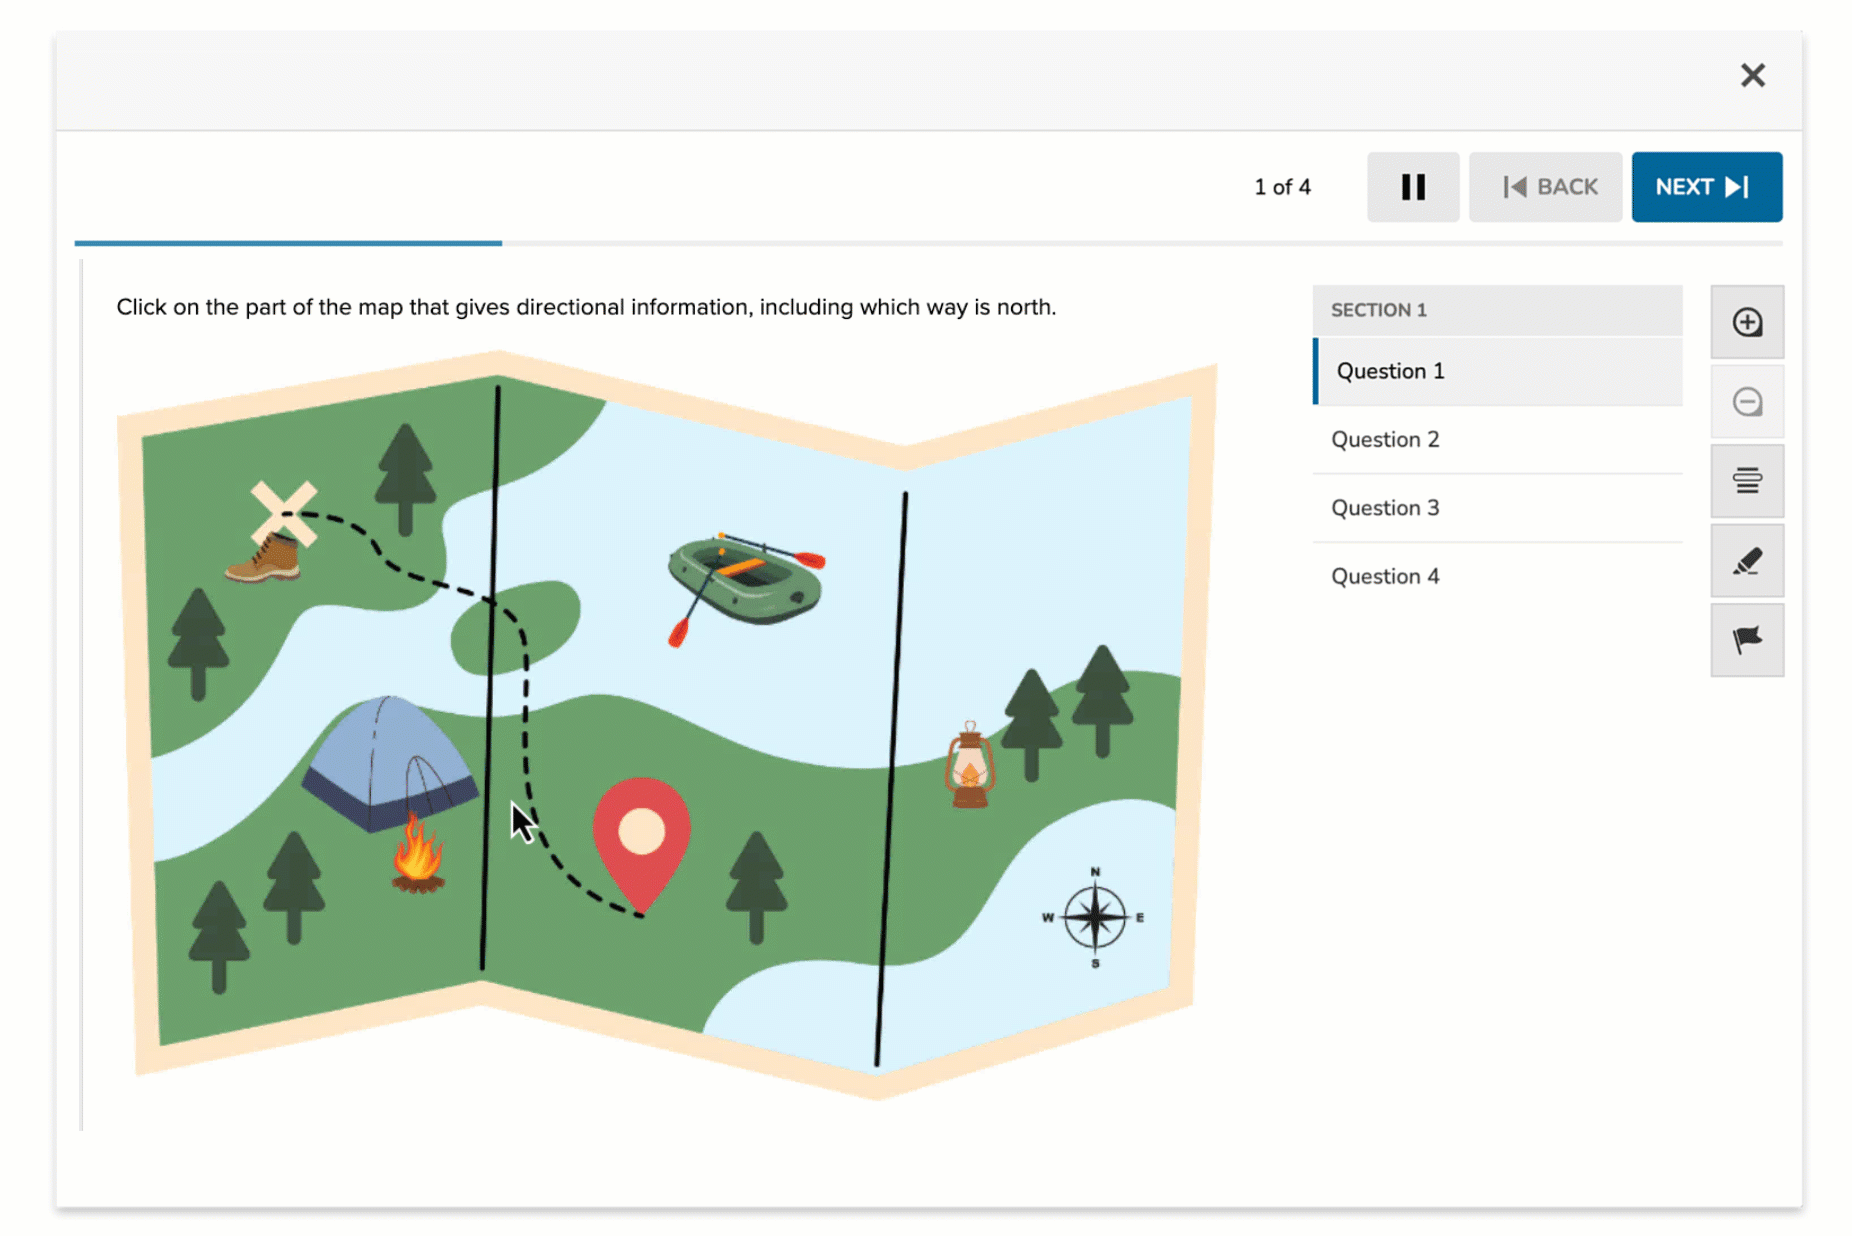
- Example: “Click on the part of the map that gives directional information, including which way is north.”
Upload the Background Image
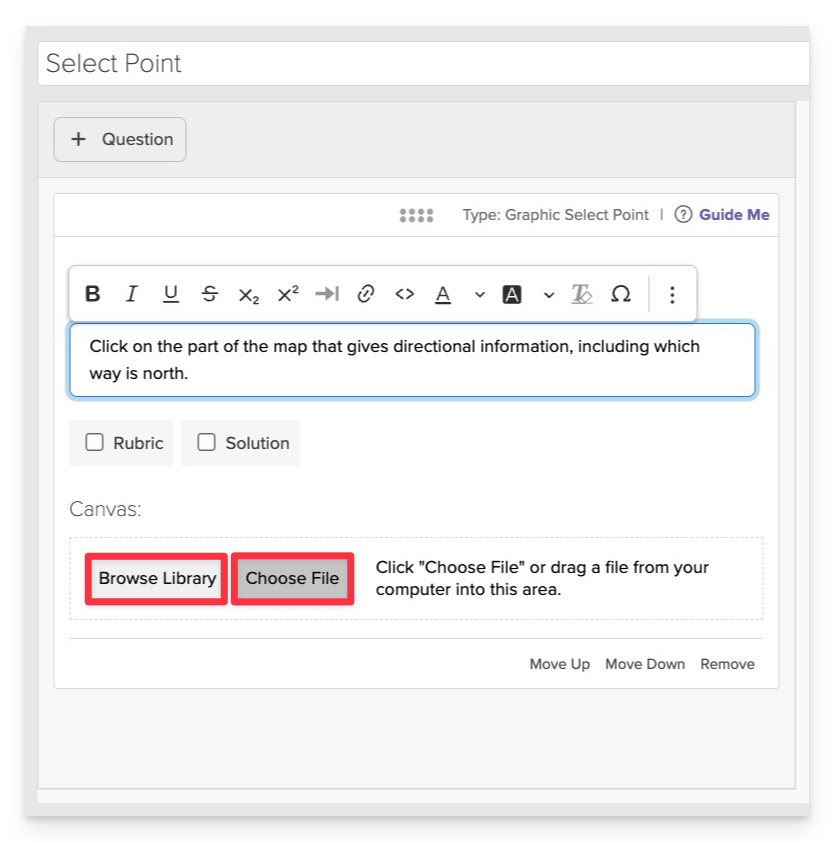
Click on Choose file or Browse Library to add the background graphic that students will interact with.
- Supported formats:
.png,.jpg,.gif.
Add and Configure Hotspots
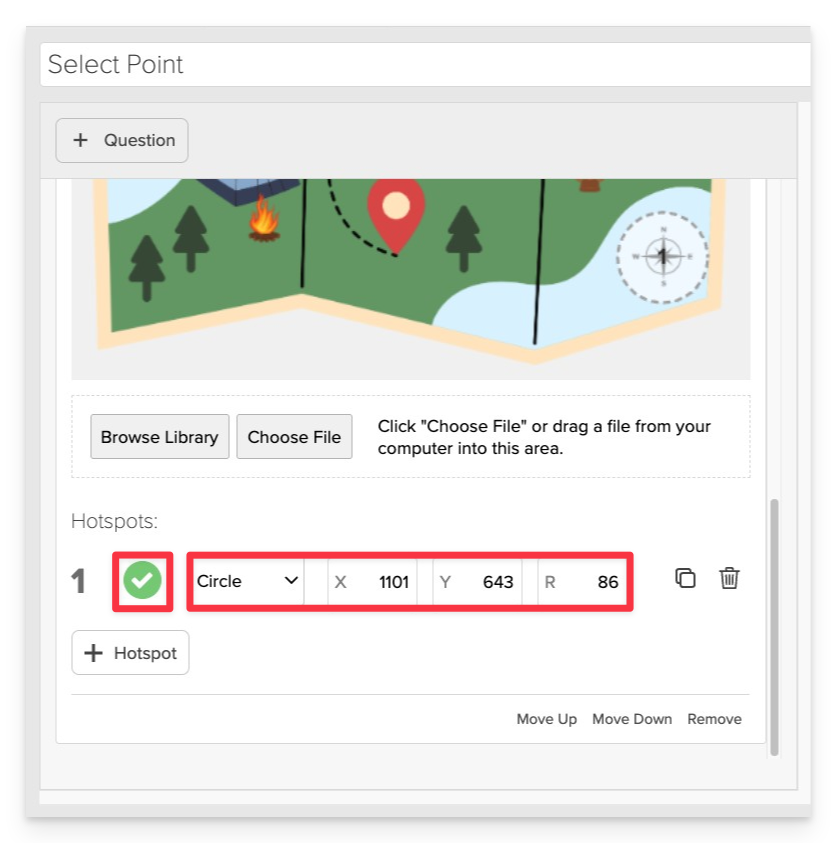
- Click the +Hotspot button.
- Choose the shape: Circle or Rectangle.
- Resize and Position the hotspot by:
-
Dragging the corner/edge handles directly on the canvas
– or –
-
Using the X, Y, Radius (circle) or X, Y, Width, Height (rectangle) fields in the sidebar to precisely set position and size.
-
Always Preview your item. In the preview, click Reveal Key to confirm that all content—such as correct answers, placement, or visual elements—appears exactly as intended. This is the quickest and most reliable way to check your setup before saving.
Save the Item
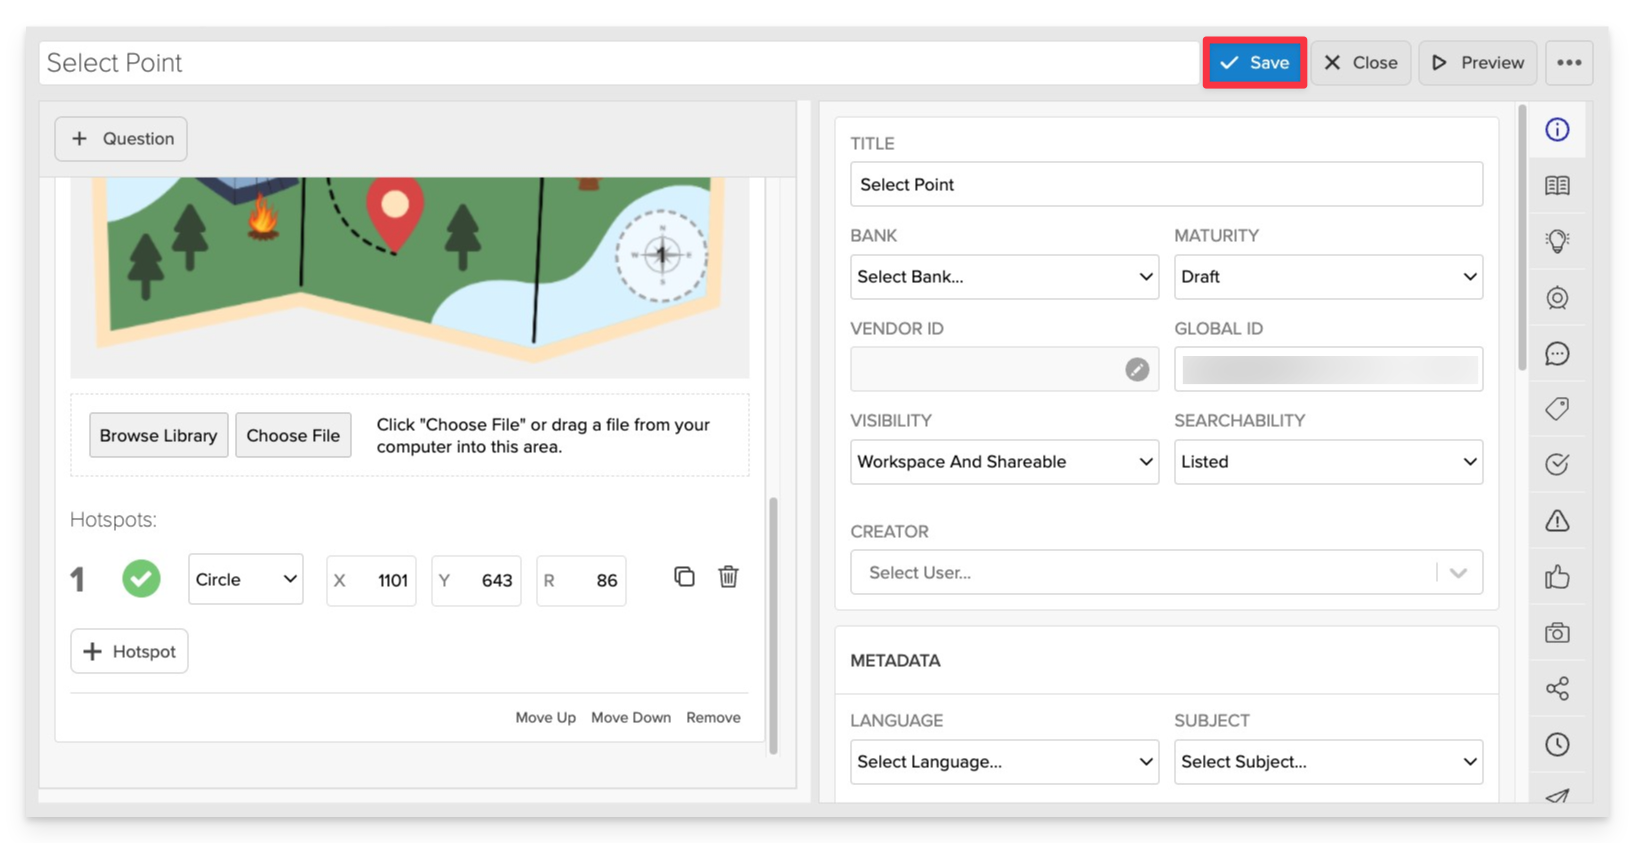
Click Save to store your item in Studio.