Create and Assign Assessments
In Campfire, you can create and assign assessments from multiple locations, including your classroom overview, the Assignments tab, and any Unit Details page.
You have two assignment creation paths: build your own from the item bank, or select an existing assessment from your library.
This guide walks you through every step of creating and assigning assessments in Campfire. Whether you're building a new assessment from scratch using the item bank or reusing an existing one from your library, you'll find all the tools you need to deliver meaningful, data-driven instruction.
We'll cover:
- Where to start an assignment
- The difference between creating a new assessment and assigning an existing one
- Step-by-step guides for using the Item Picker and Passage tools
- Optional steps for teachers using reading passages
- How to assign your assessment to classrooms and units
By the end of this guide, you'll be ready to confidently create, customize, and assign assessments that support student learning and provide actionable insights.
Click +Assignment Button
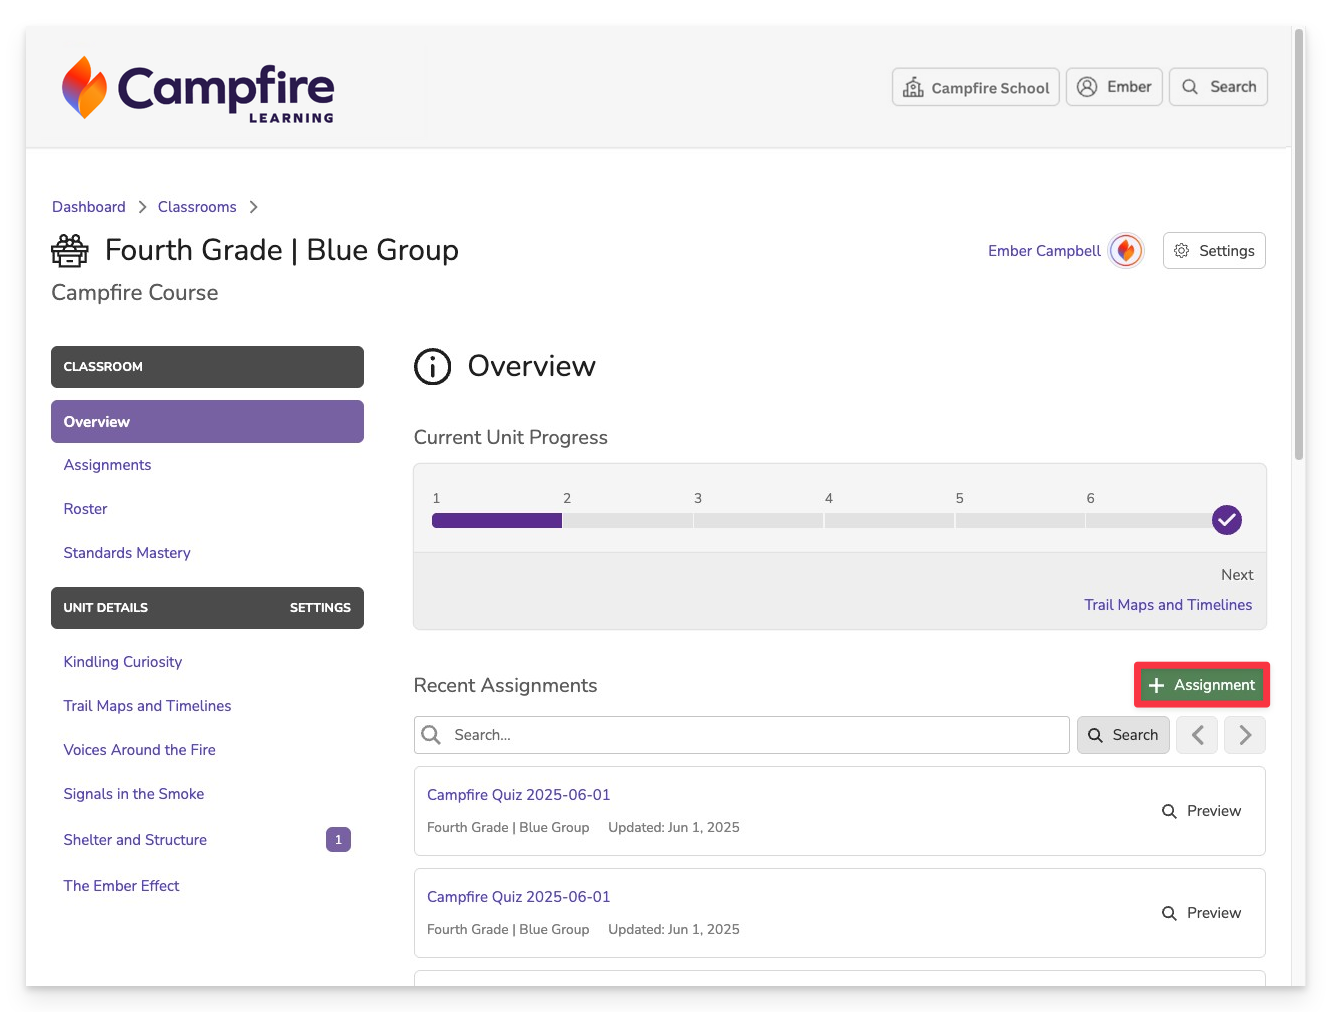
You can find the +Assignment button in multiple parts of the platform, making it easy to start assigning wherever you're working.
You can launch it from:
- The Home Dashboard
- The Classroom Overview
- The Assignments tab
- Any Unit Details page
Choose an Assignment Type
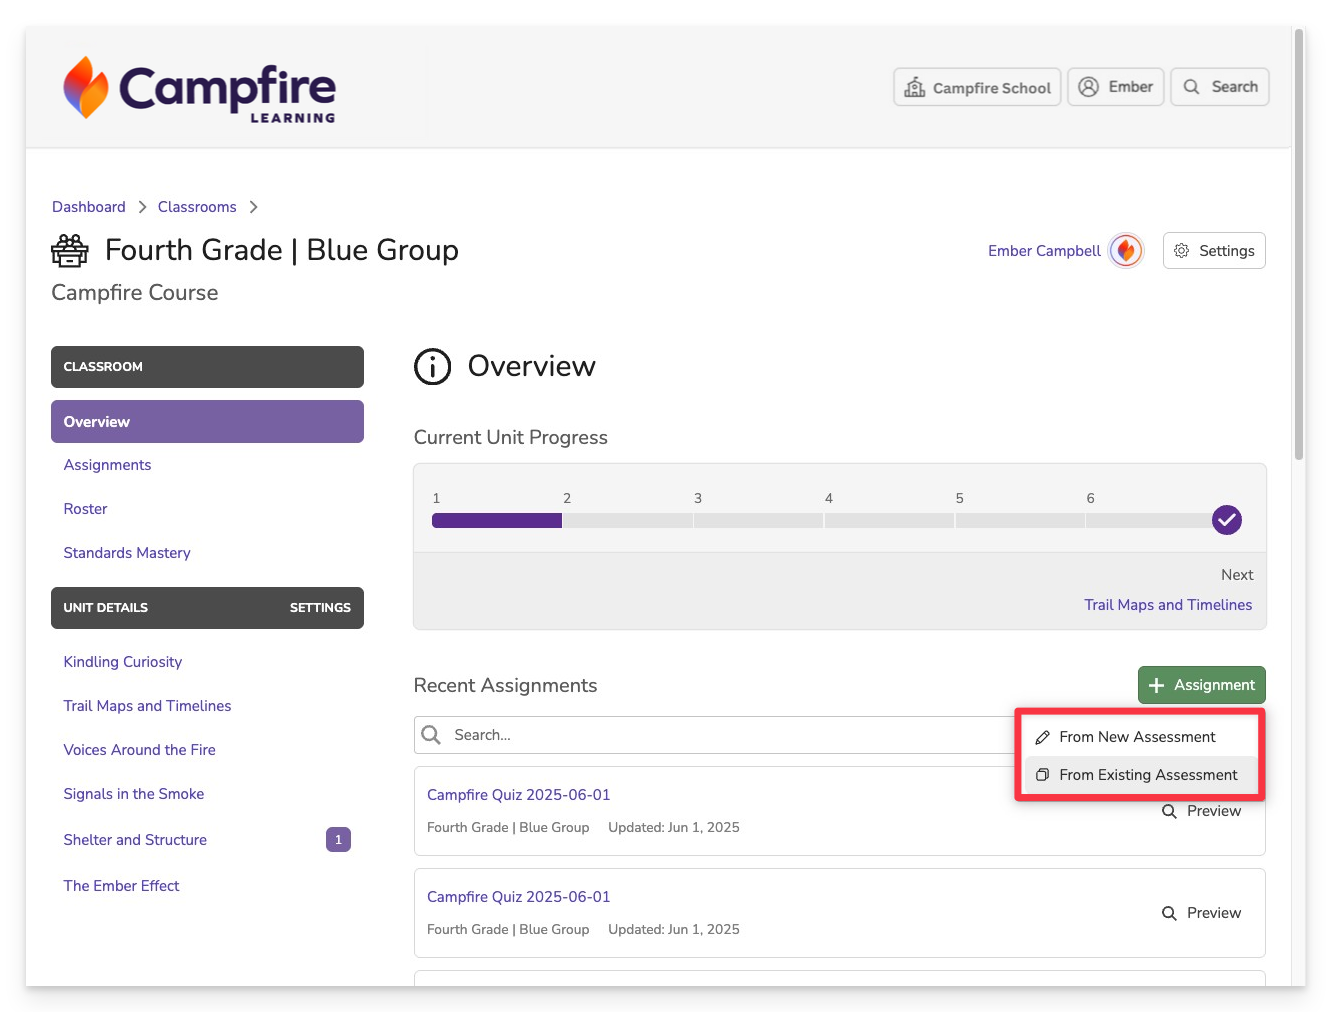
After clicking the +Assignment button, you’ll be asked to choose between two options:
- From New Assessment: Use this to build a brand-new assessment using items from the Campfire item bank. You can manually select items or use the builder to generate a set based on standards and subject filters.
- From Existing Assessment: Use this to assign an assessment you've previously created or one that has been shared with you. It’s ideal for quickly reusing or distributing proven materials.
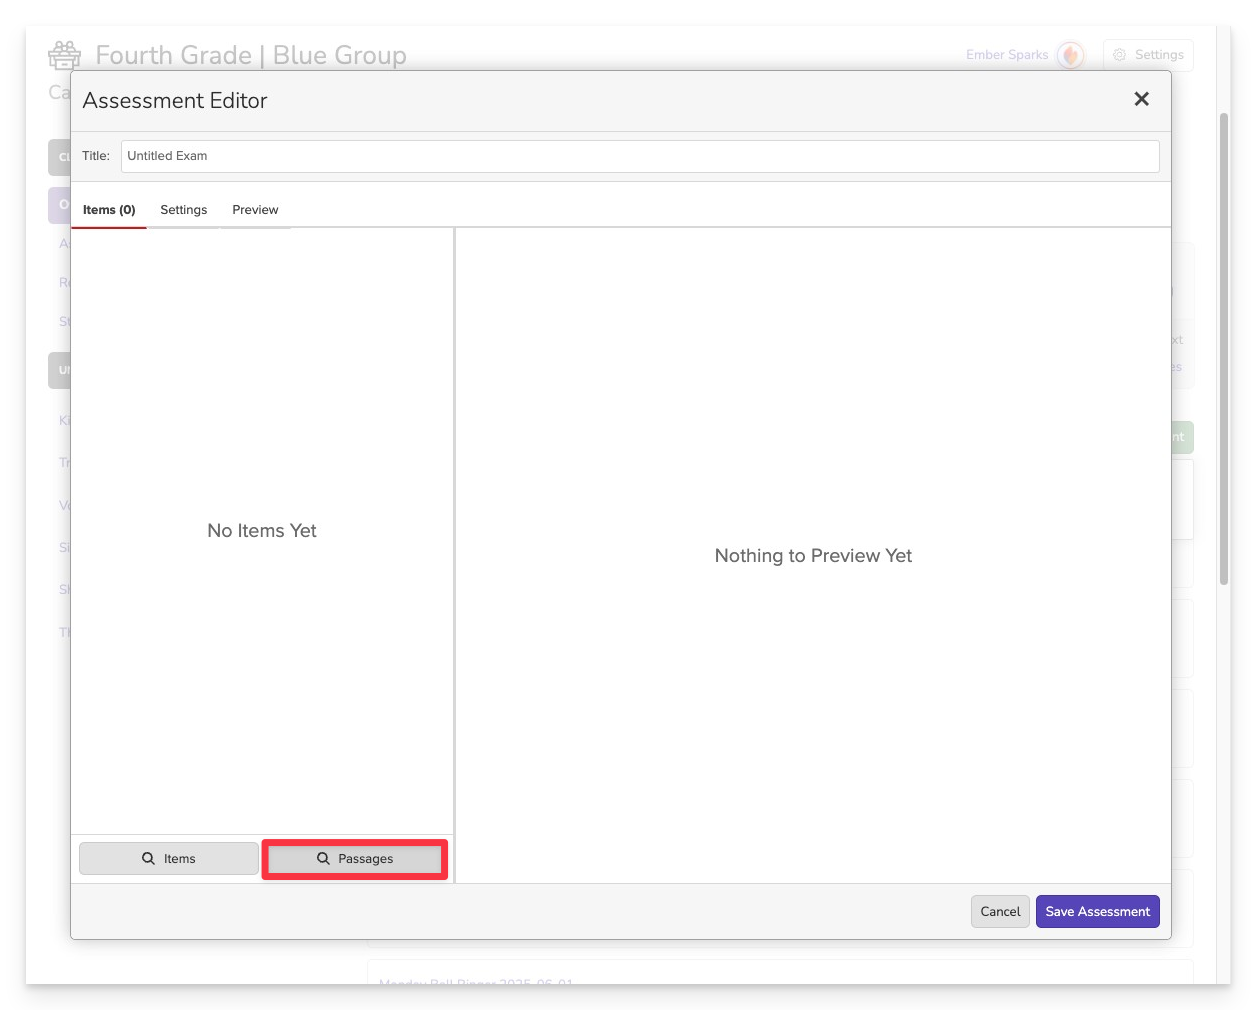
From New Assessment
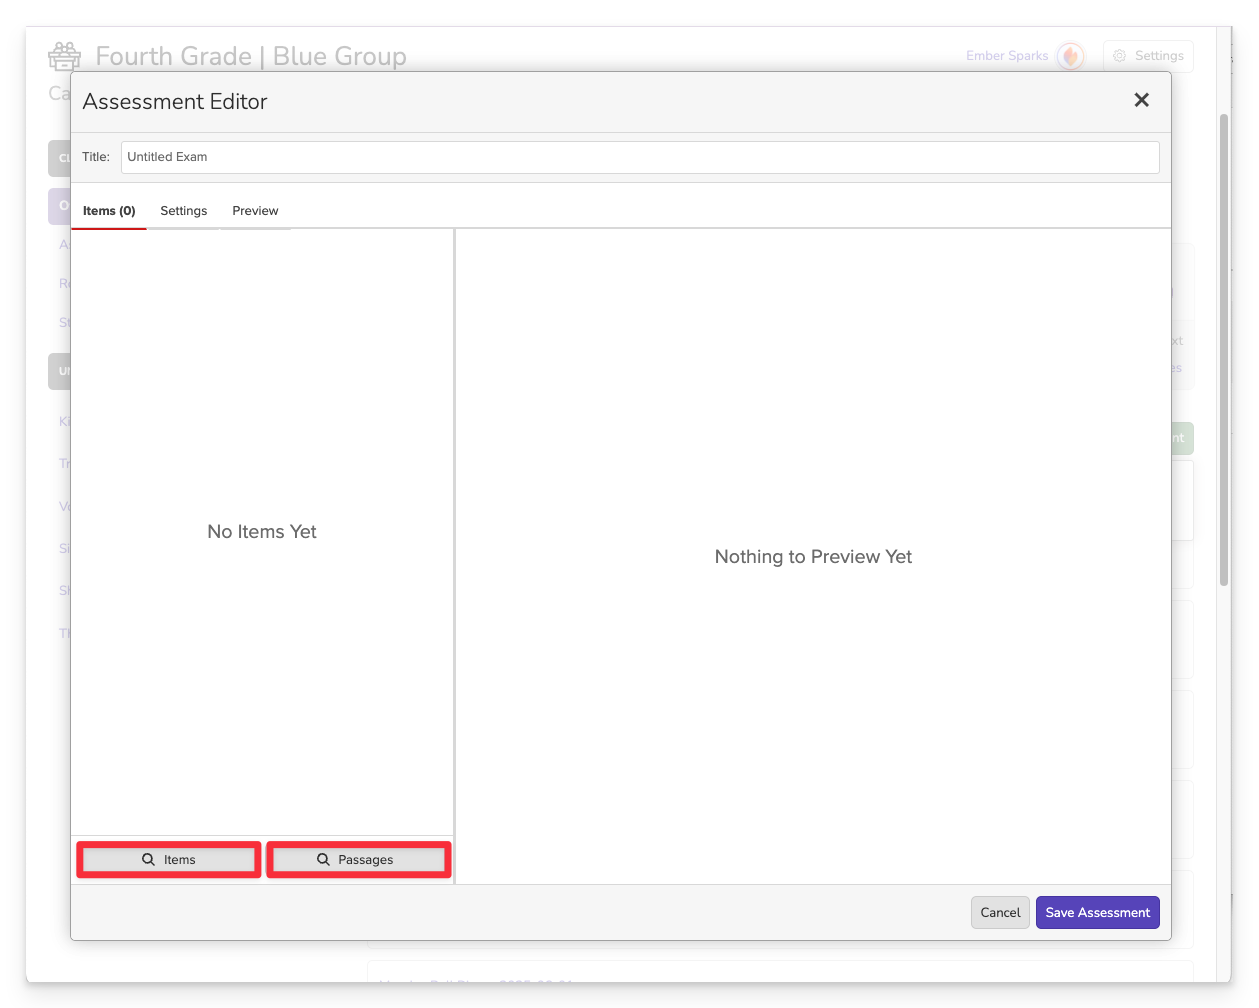
Use this to build your own assessment using items from the item bank.
To build:
- Select From New Assessment.
- Choose how to build:
- Item Search: Manually filter and select items.
- Passages: Ensure all selected items are tied to the same central passage(s).
- Item Picker
- Passage Picker
Launch the Item Picker
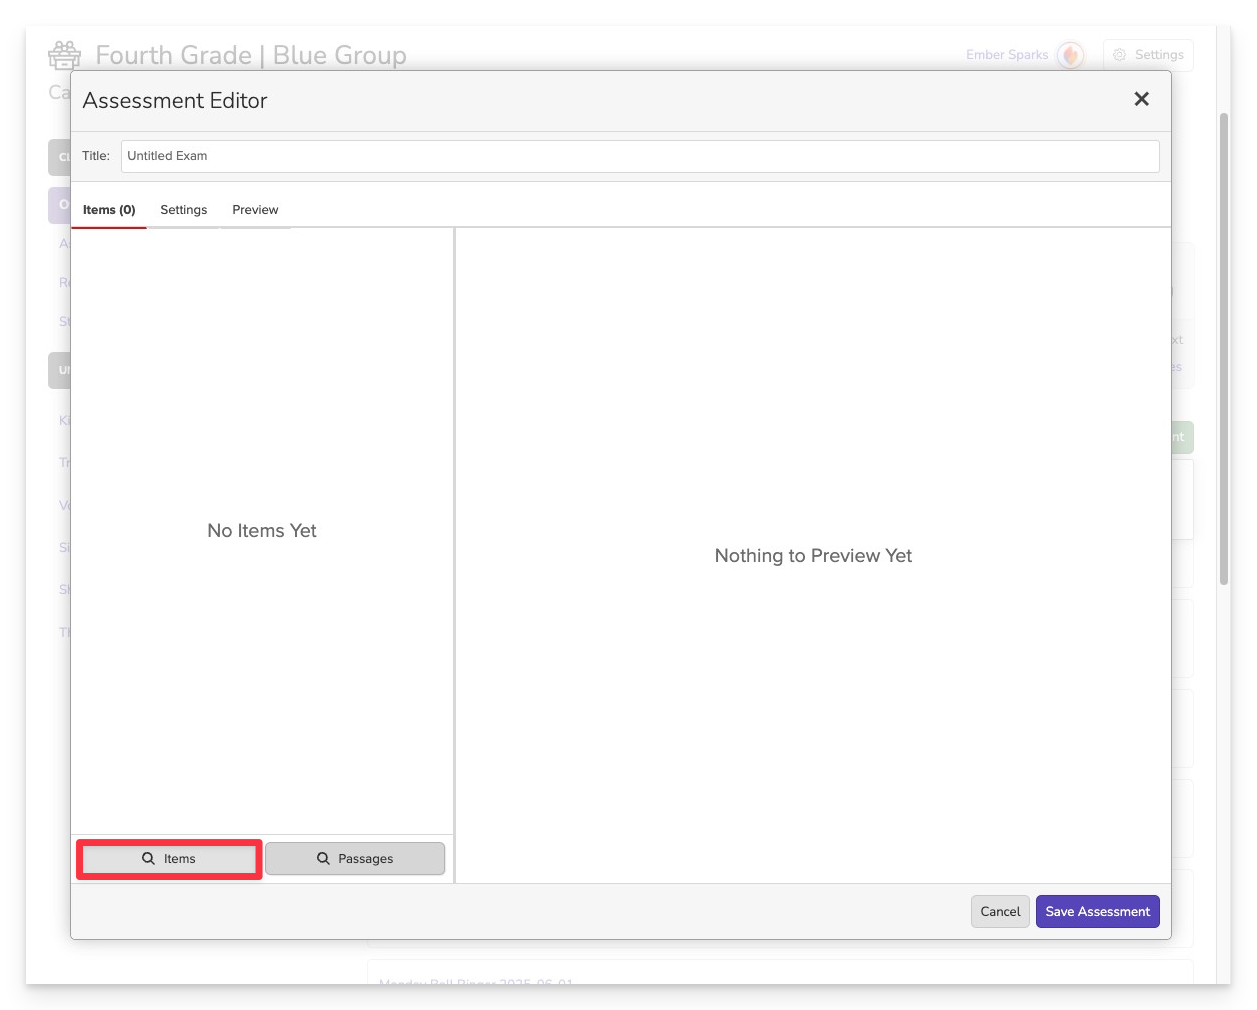
Choose Items as your method for creating the assessment.
Filter Content

Use the filters on the left side of the screen to narrow down items by grade, subject, standard, item type, and more.
Preview Items

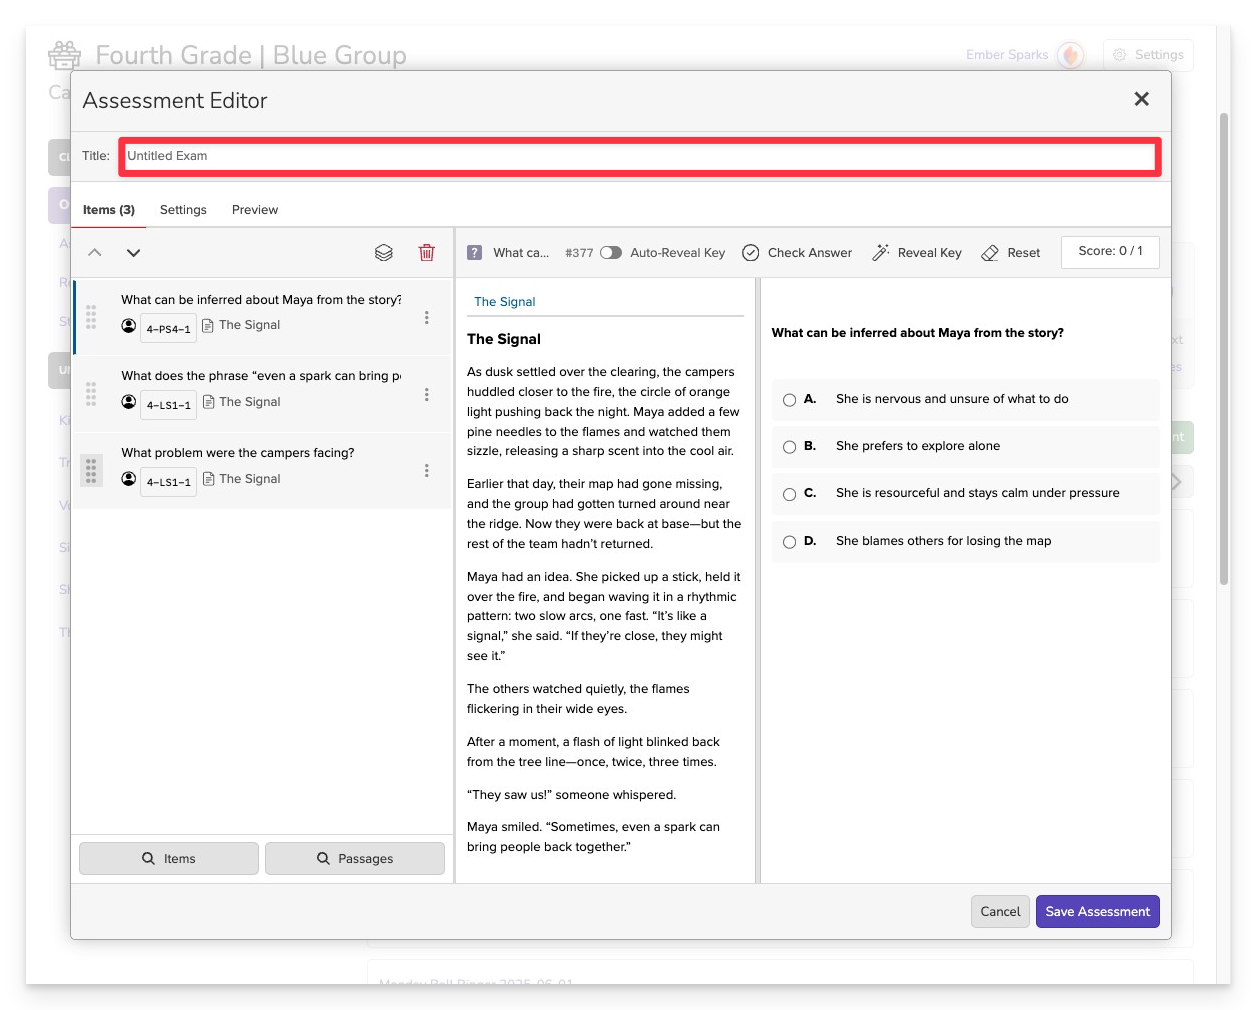
Click on any item to view a full preview, including the question, answer choices, etc.
Explore the Assessment Preview
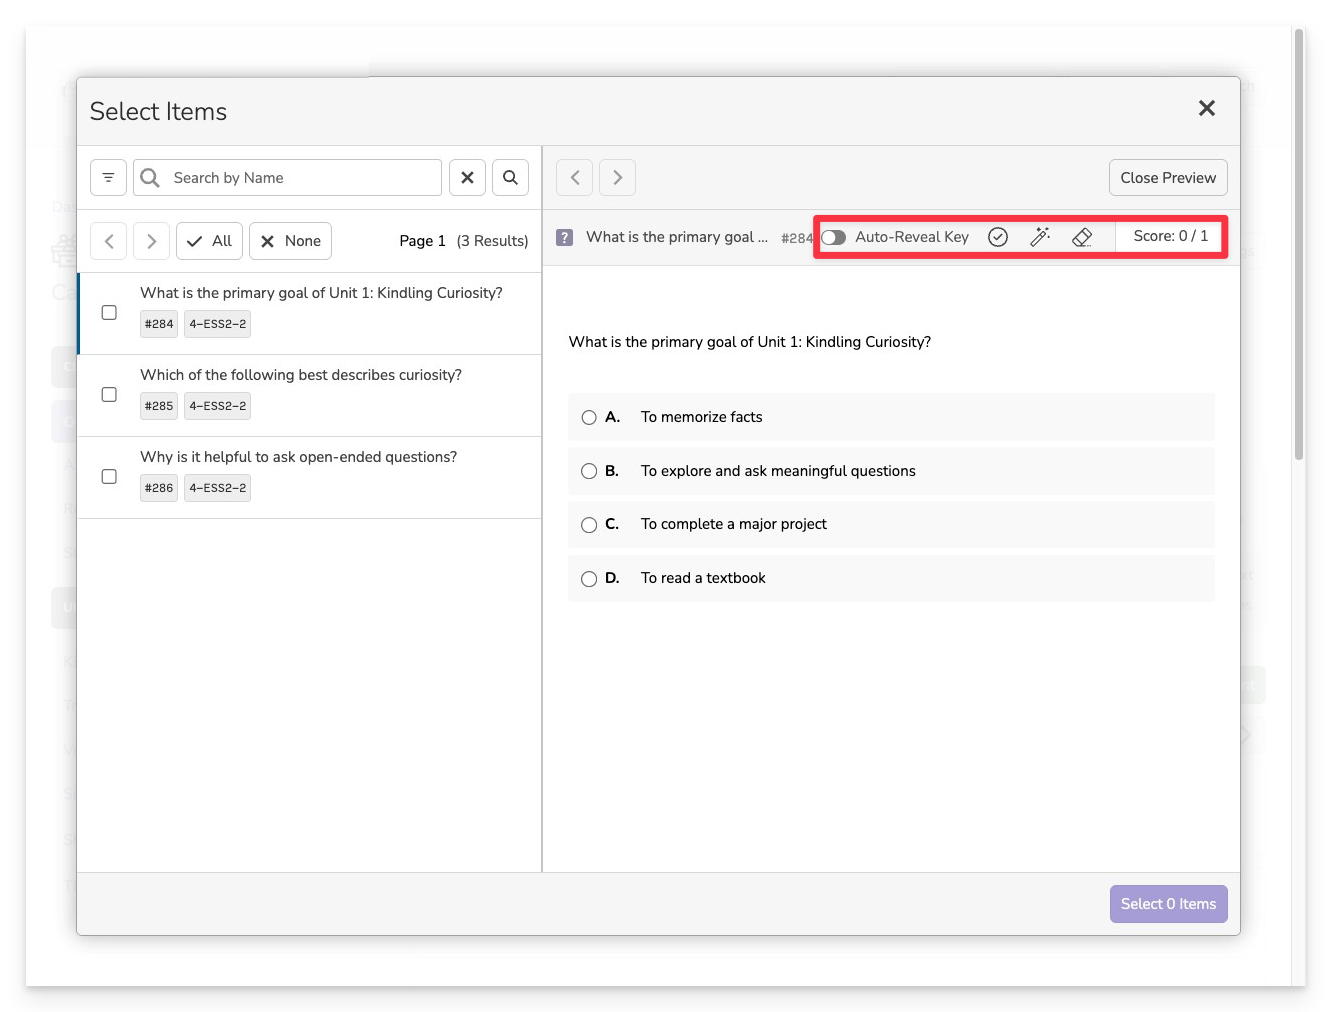
Within the preview, you can:
- Reveal the correct answer key.
- Click on an answer choice to check your understanding.
- View preset scoring rules for the item, such as point values or partial credit criteria.
Select Items Using Checkboxes
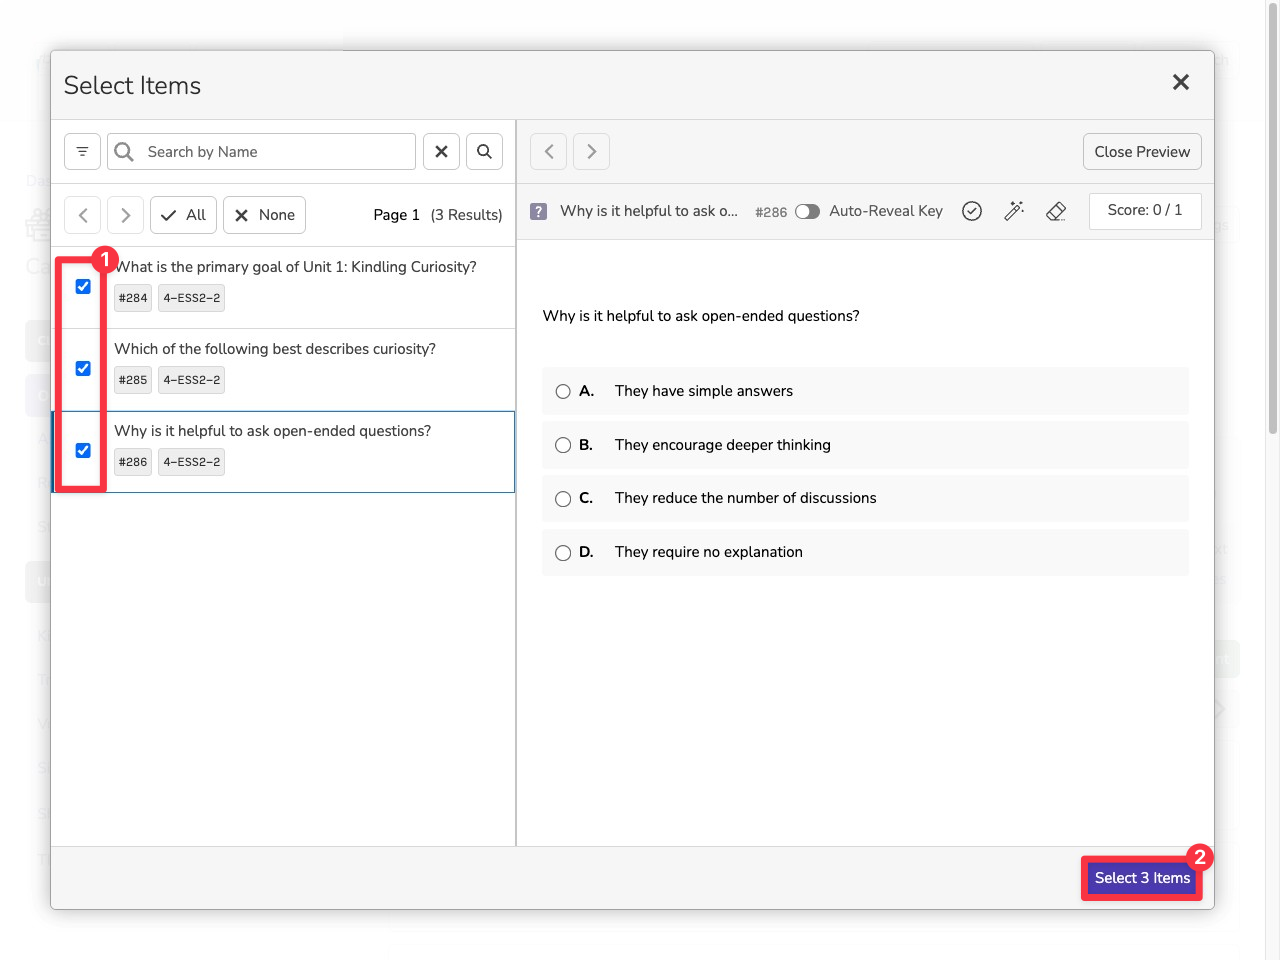
- Use the checkboxes next to each item to select the ones you want to include in your assessment.
- After choosing your items, click the Select Items button to add them to your assessment draft.
You can continue filtering and adding more items to your assessment by changing filter settings and repeating the selection process.
Organize and Customize

After importing your items:
- Rearrange items to change the order in which they appear.
- Swap or delete items using the icons next to each one.
- Group items by passage to ensure they remain aligned with their corresponding text.
- Add more content by selecting additional passages or more items at any time.
- Preview item details including the correct answer key, interactive answer checking, and preset scoring rules such as point values or partial credit criteria.
Title Your Assessment
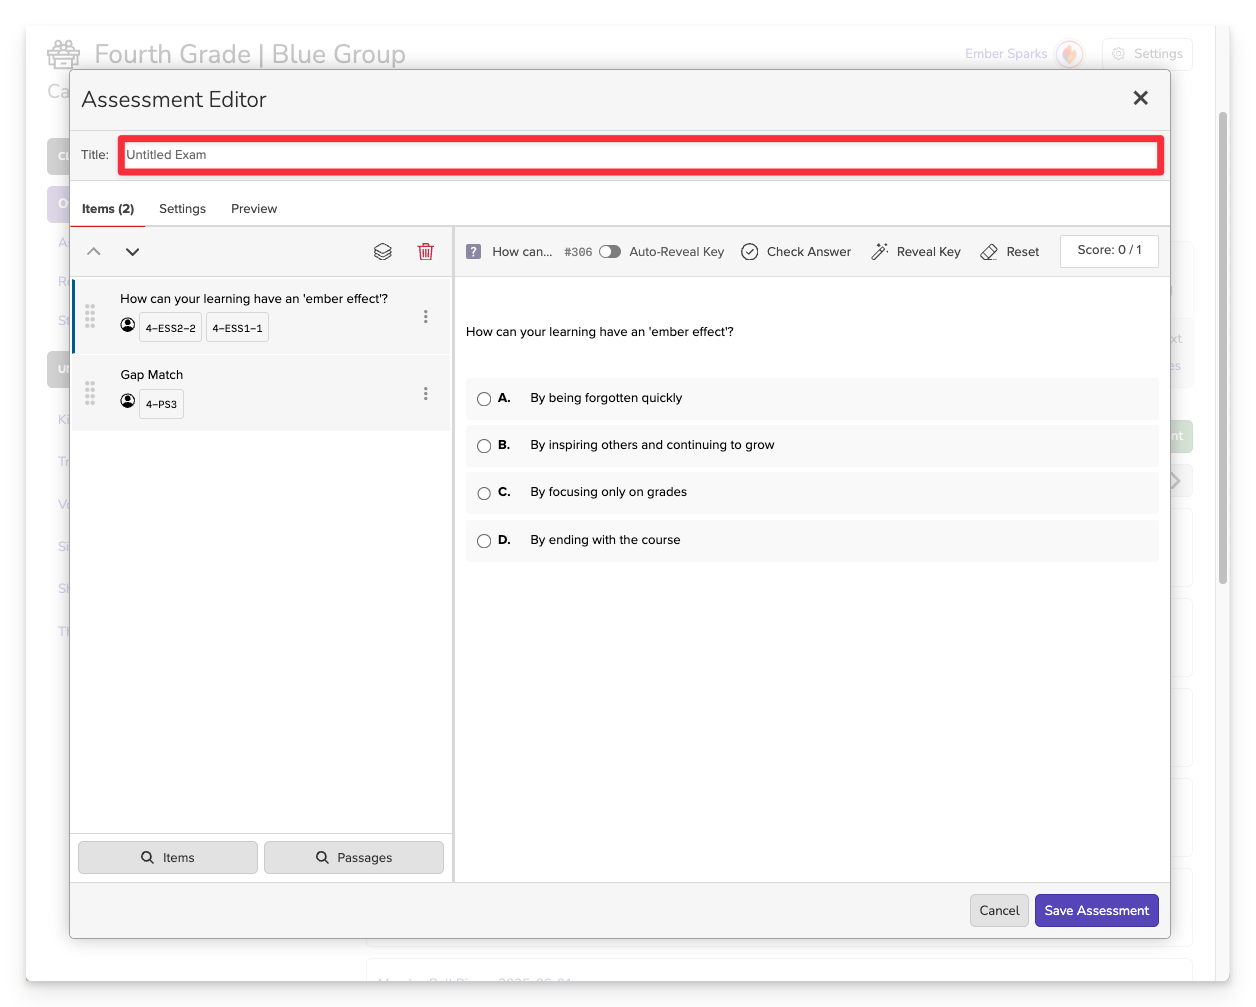
Before you can save and assign your assessment, you must enter a title for your assessment.
Future you will appreciate a clear and descriptive title for your assessment.
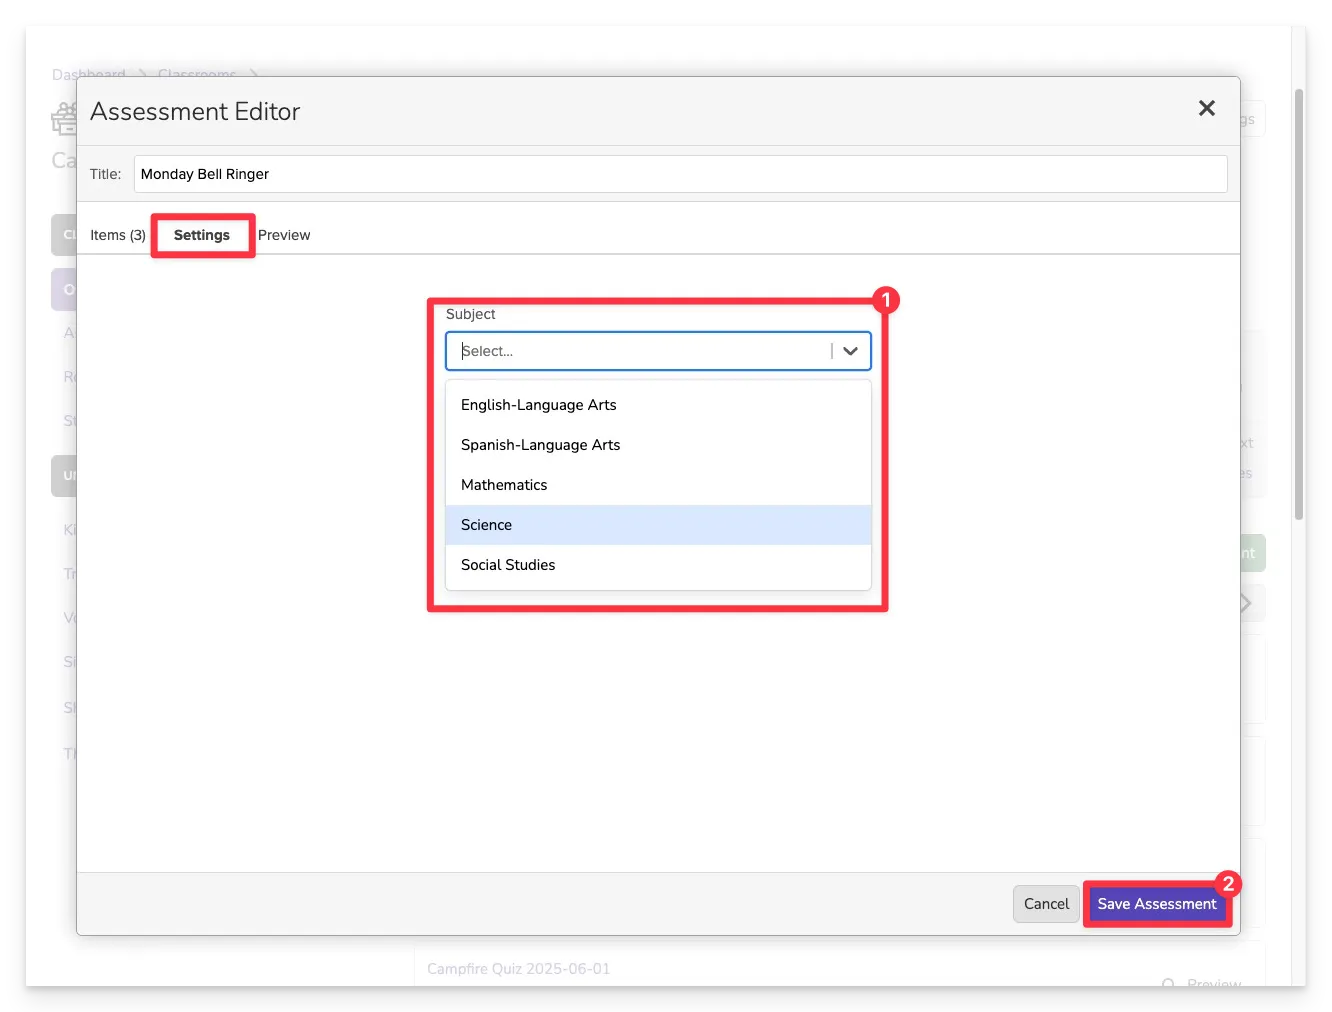
Set the Subject
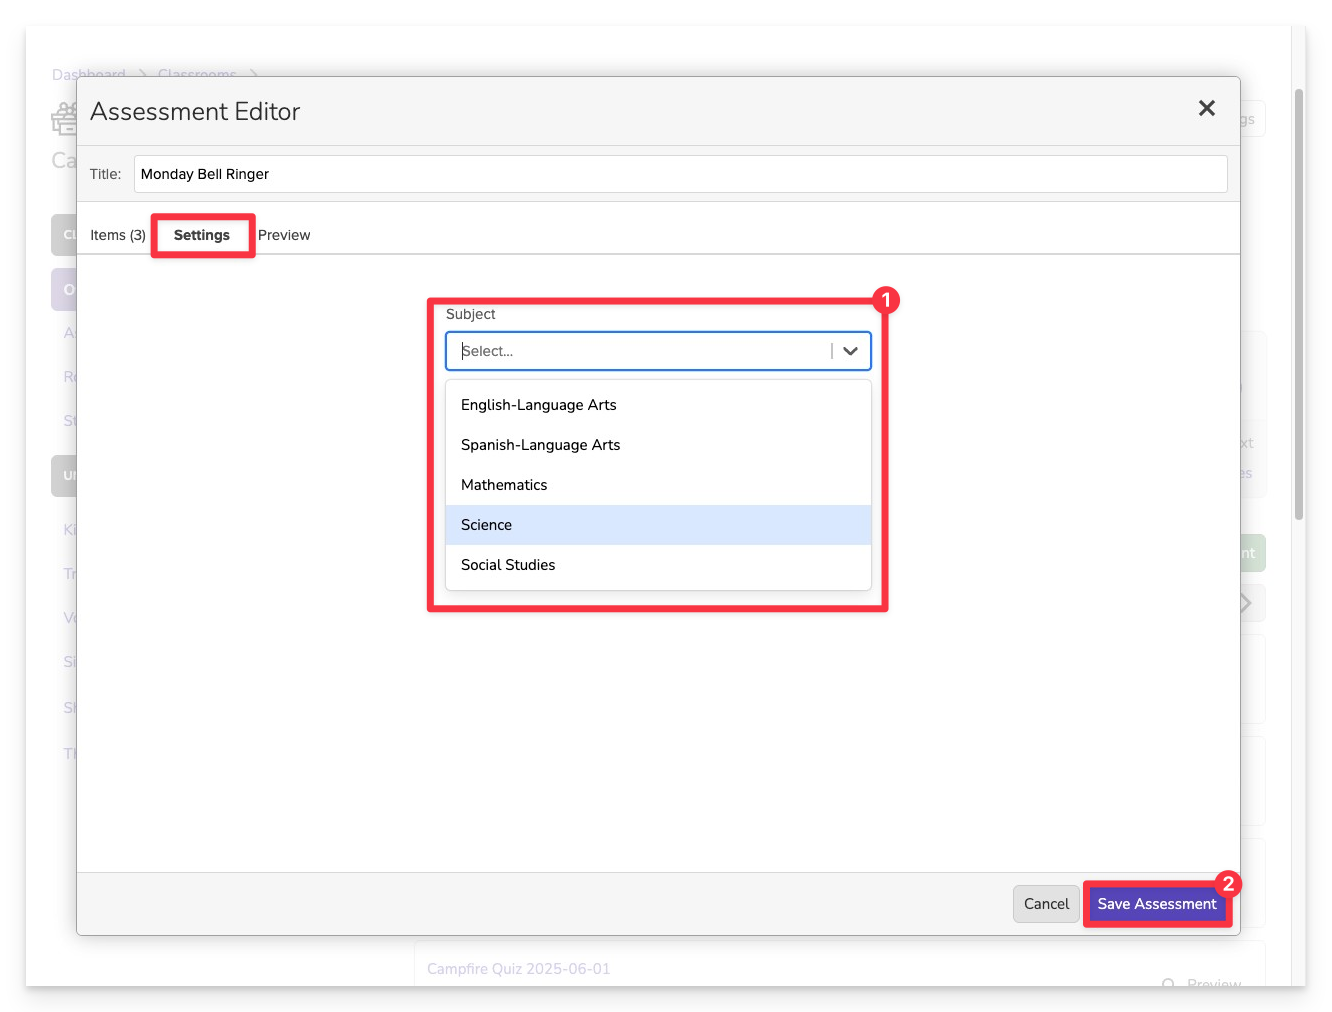
In the Settings panel:
- Choose the appropriate Subject for your assessment.
- Some Campfires may also allow you to save your Assessment to a specific Unit
- Click Save Assessment
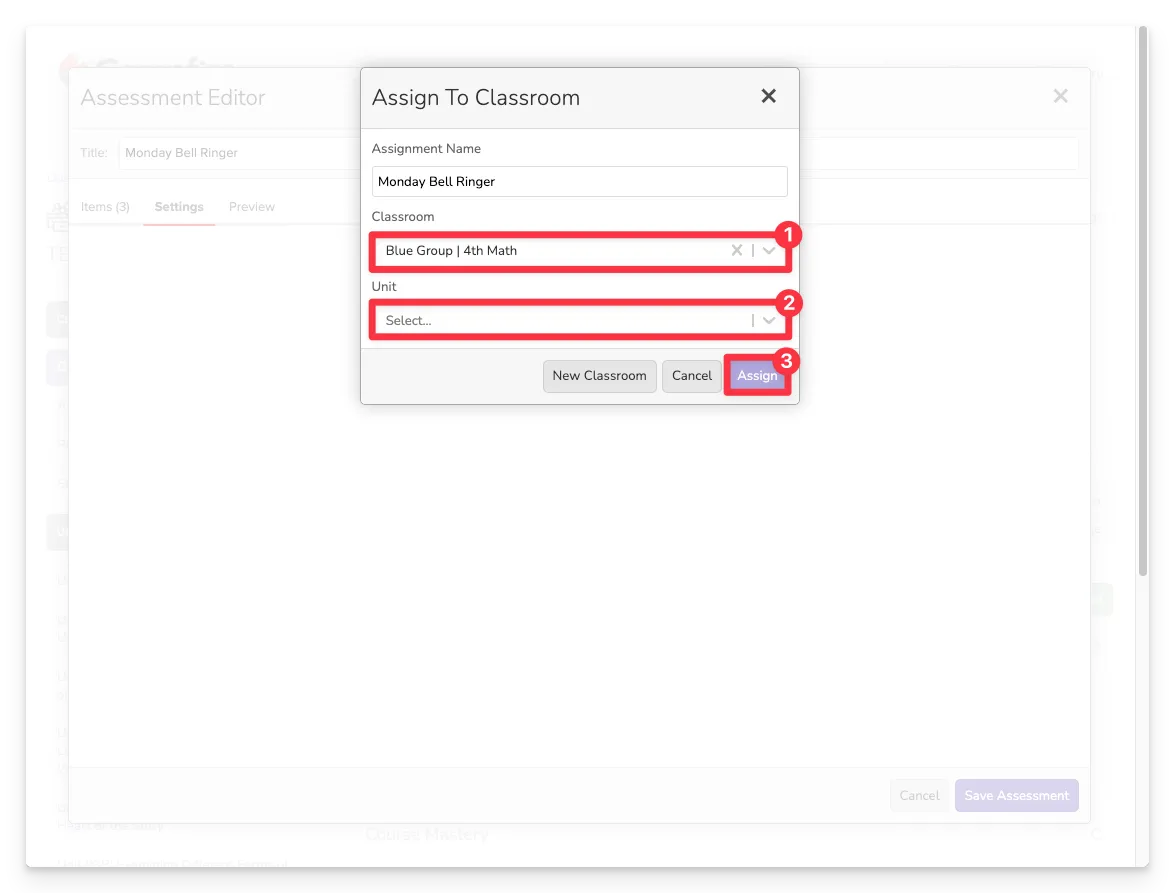
Assign Your New Assessment
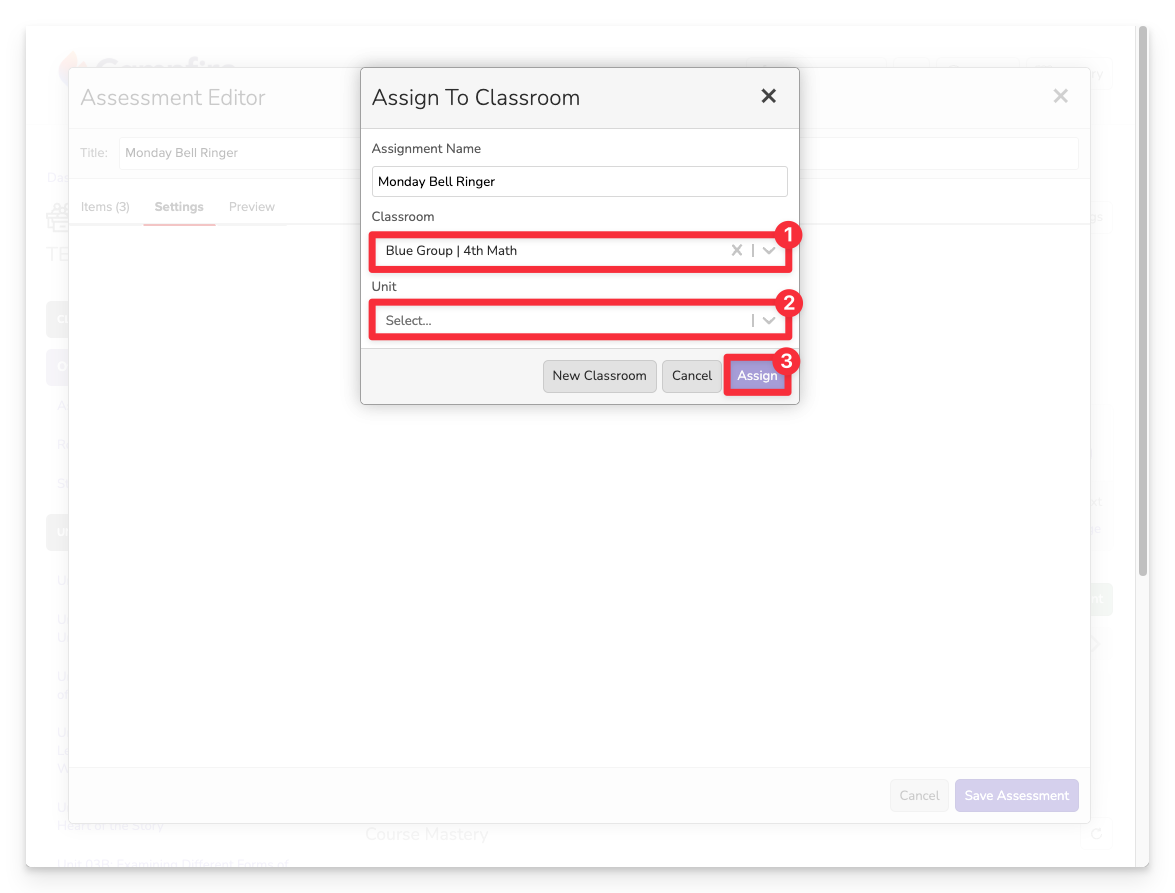
Once you’ve saved your assessment, you’ll be prompted to assign it to your students:
- Select the classroom where the assessment should be delivered.
- (Optional) Choose a unit to associate the assessment with.
- Click Assign to publish it to the selected classroom.
Your assessment will now appear in the Assignments section of that classroom.
Launch the Passage Selector
Choose Passages as your method for creating the assessment.
Filter Passage Content
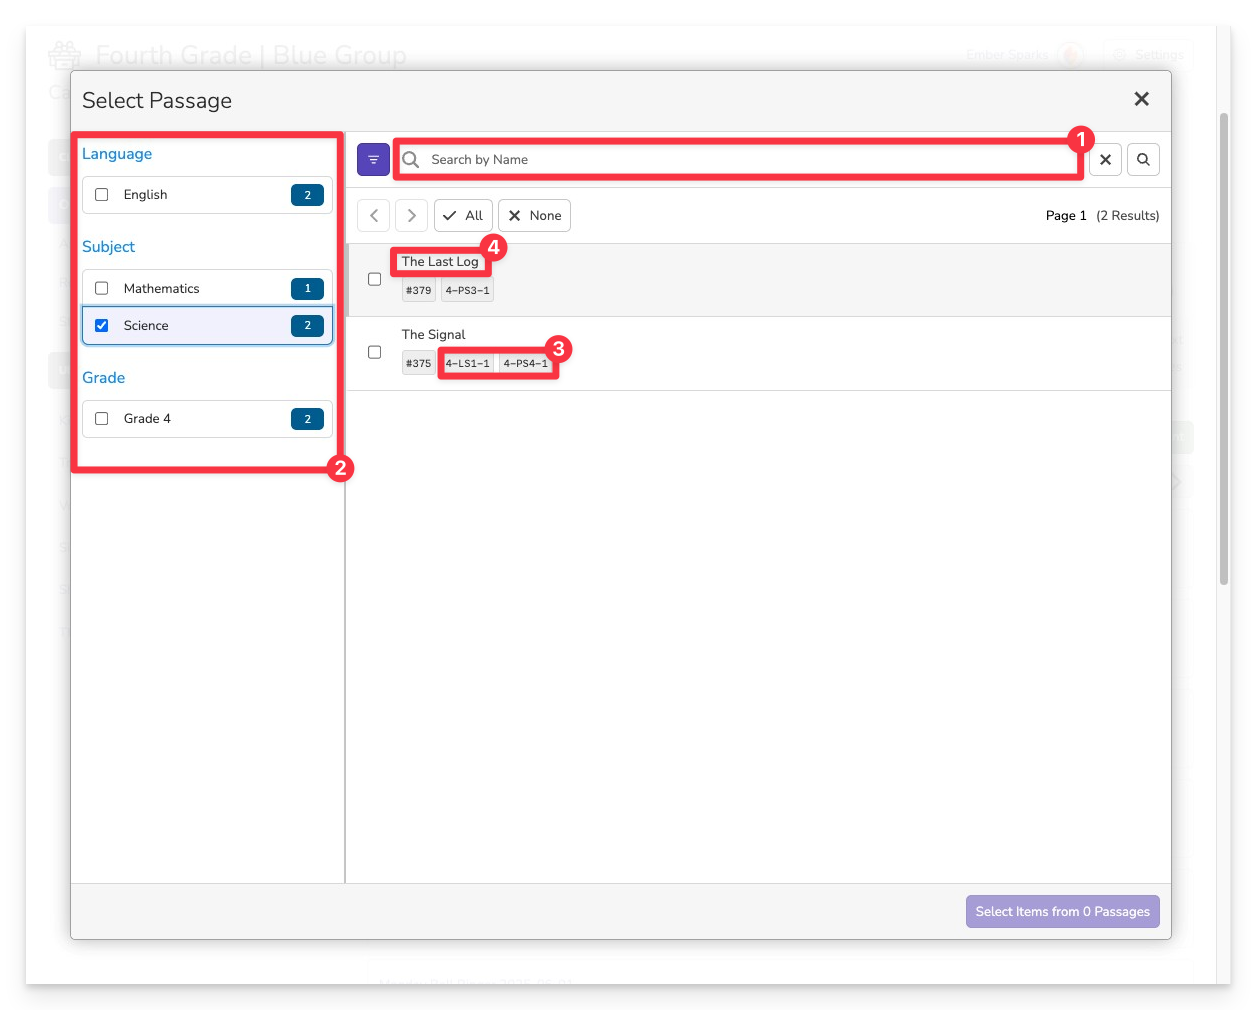
Use the search bar [1] or left-hand [2] filters to find a passage by keyword, subject, grade, or standard, etc.
- The tags below the passage show which Learning Standards the items associated to the passage covers.
- Click a passage to preview it and the items associated with it.
Add the Passage
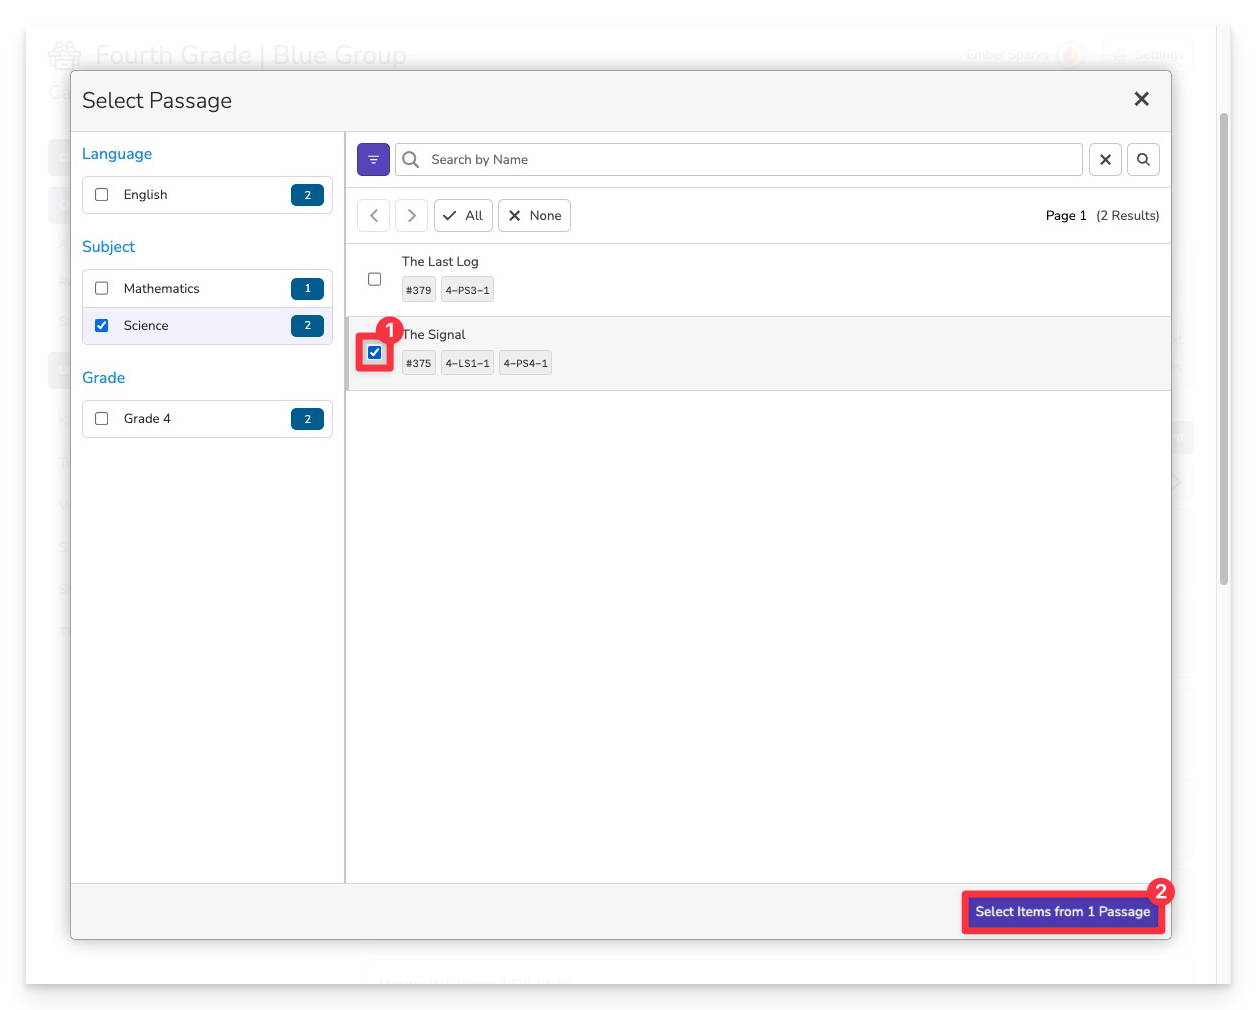
To add a passage and all items linked to it:
- Click the checkbox next to the passage name.
- Click Select Items from (1) Passage.
You can select multiple relevant passages to give yourself a broader pool of aligned items to choose from. Just remember—each passage will need to be read by students, so choose the number of passages thoughtfully.
Organize and Customize

After importing your passages and items:
- Rearrange items to change the order in which they appear.
- Swap or delete items using the icons next to each one.
- Group items by passage to ensure they remain aligned with their corresponding text.
- Add more content by selecting additional passages or more items at any time.
- Preview item details including the correct answer key, interactive answer checking, and preset scoring rules such as point values or partial credit criteria.
Title Your Assessment
Before you can save and assign your assessment, you must enter a title for your assessment.
Future you will appreciate a clear and descriptive title for your assessment.
Set the Subject
In the Settings panel:
- Choose the appropriate Subject for your assessment.
- Some Campfires may also allow you to save your Assessment to a specific Unit
- Click Save Assessment
Assign Your New Assessment
Once you’ve saved your assessment, you’ll be prompted to assign it to your students:
- Select the classroom where the assessment should be delivered.
- (Optional) Choose a unit to associate the assessment with.
- Click Assign to publish it to the selected classroom.
Your assessment will now appear in the Assignments section of that classroom.
- From Existing Assessment
From Existing Assessment
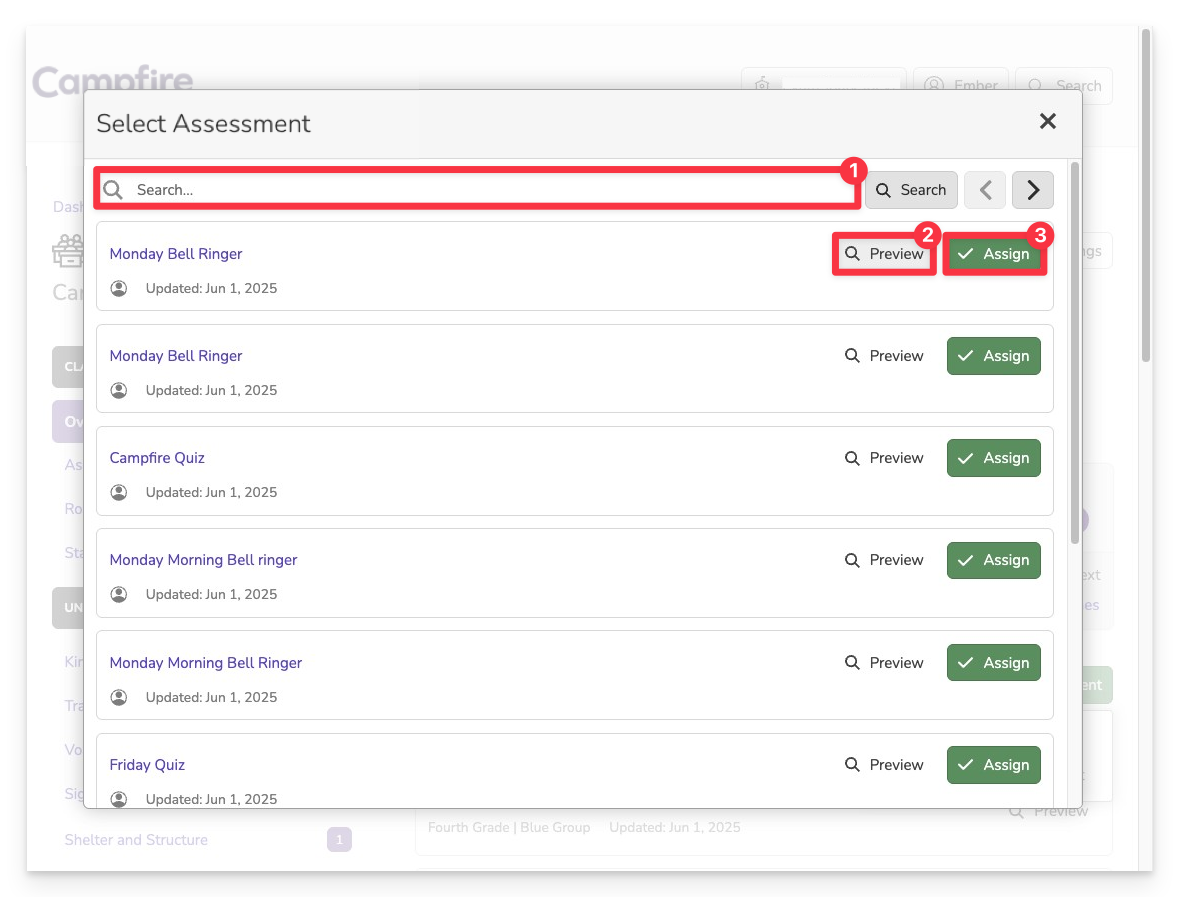
You’ll see a list of preexisting assessments, including:
- Assessments you’ve created
- Assessments shared with you by colleagues, districts, or partners
- Use the search bar to find an assessment by title.
- Click Preview to see how the assessment will look in the student view.
- When you're ready, click Assign to proceed with assigning the assessment to a classroom.
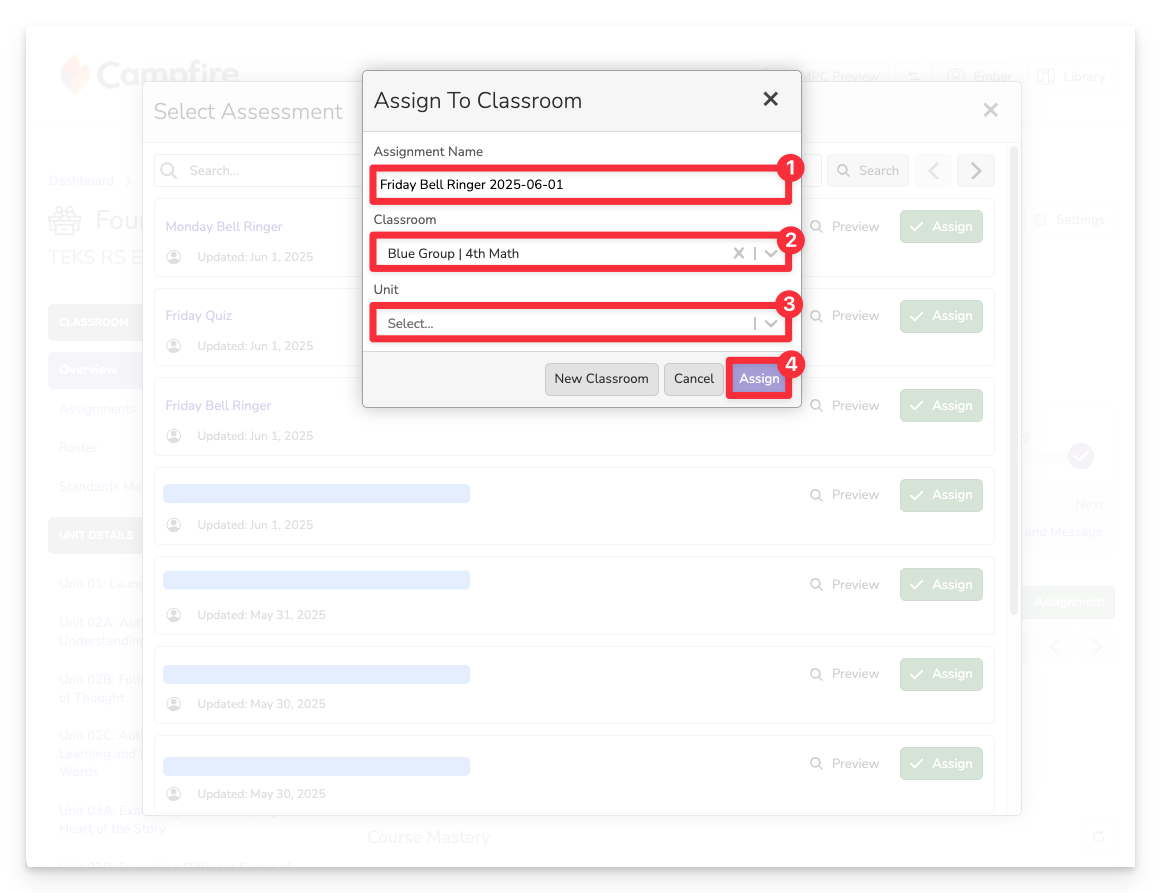
Assign the Assessment
Once you’ve found the assessment you want to use:
- The system will auto-generate a name with a timestamp for easy tracking (you can edit this if desired).
- Select the classroom where you want the assessment delivered.
- (Optional) Choose a unit to associate the assessment with.
- Click Assign to publish it to the selected classroom.
Once that you’ve created or assigned your assessment, it will appear in the Assignments section of your classroom. Students will be able to access it using their access codes, and you’ll begin seeing real-time data as responses come in.
Be sure to check back in the Classroom Overview, Standards Mastery, and Assignment Details views to monitor progress, analyze performance, and plan your next instructional steps.
If you need help editing, reassigning, or reviewing results, explore our help articles more. You're ready to launch learning in Campfire!