Create a Classroom
What Is a classroom?
A classroom represents a group of students organized for instructional or assessment purposes. Classrooms help you manage rosters, assign assessments, and track student progress.
If you’ve previously created classrooms in a companion curriculum Campfire, they will automatically appear in the assessment platform—no need to recreate them.
Create a Classroom
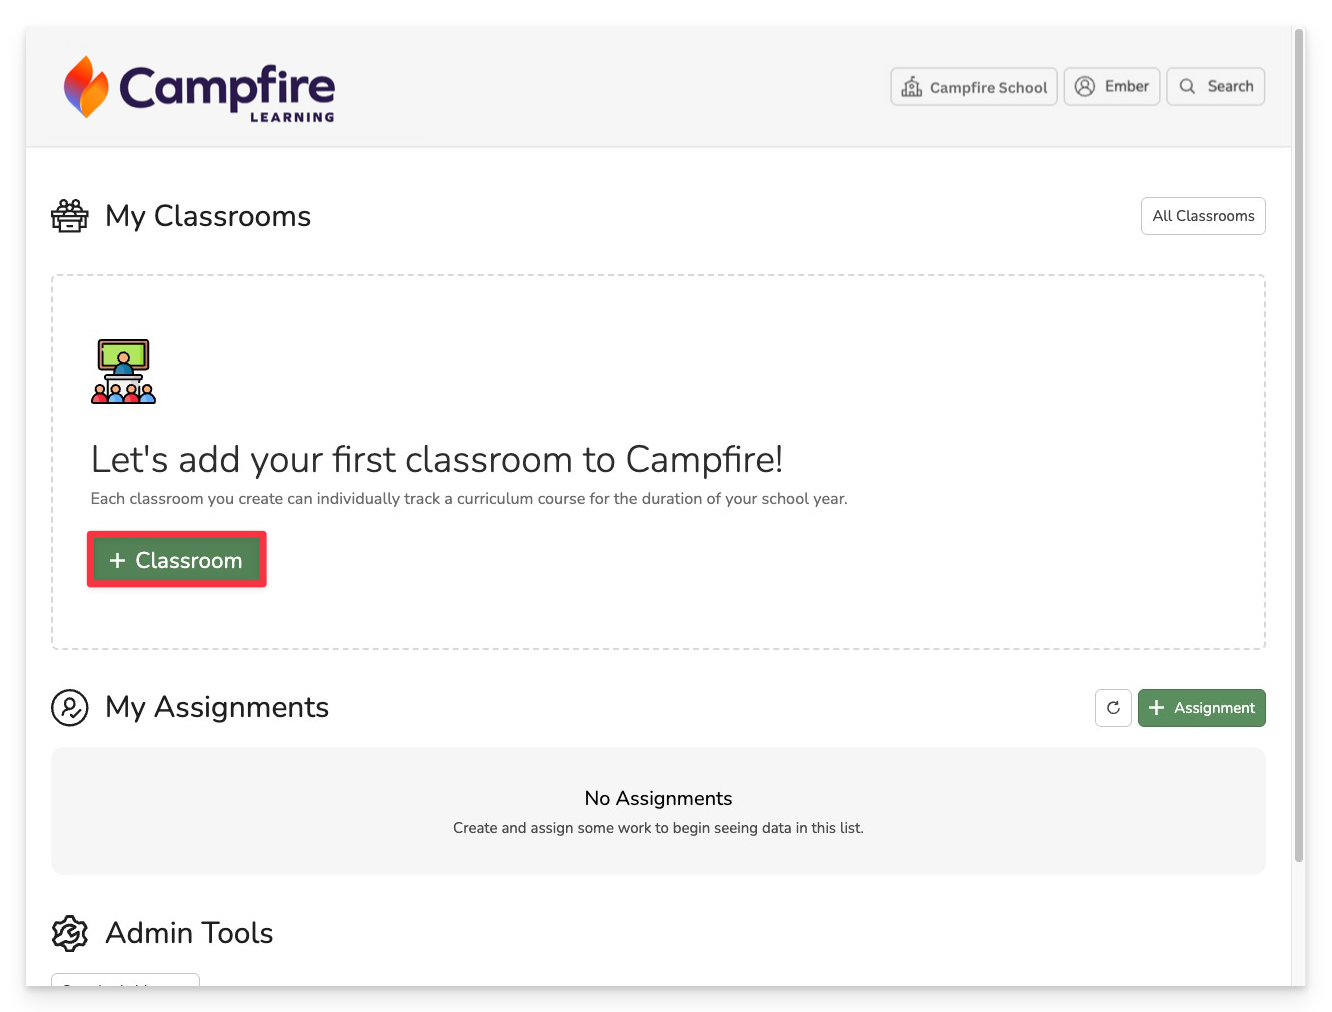
Click the +Classroom button to create your first classroom. To add other classrooms, click +Add New Classroom.
Select Classroom Type
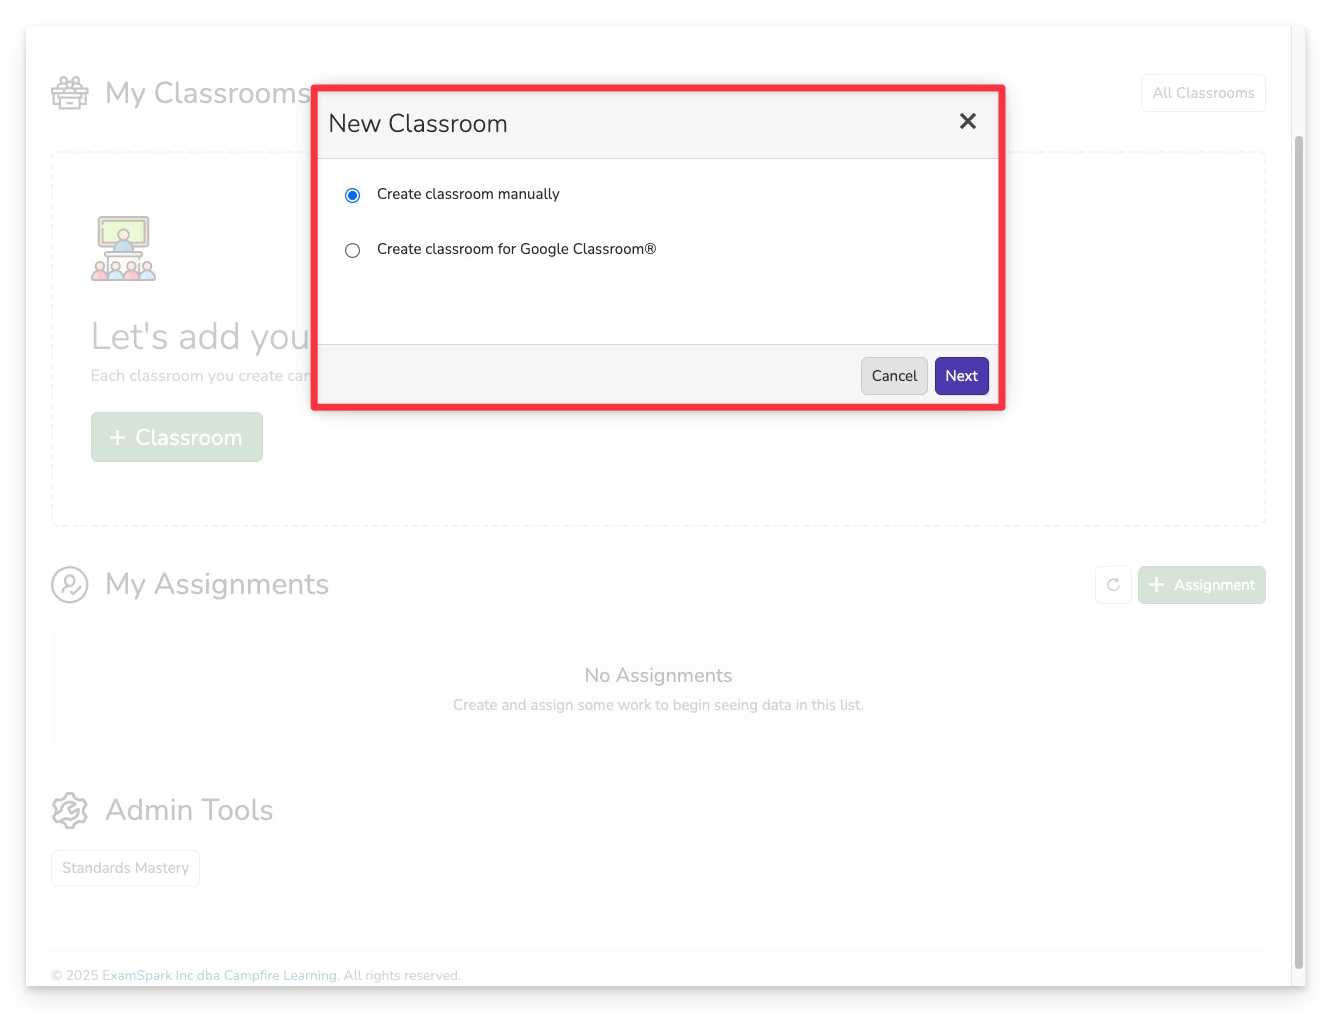
You can create your classroom in one of a few ways ways:
- Create Classroom Manually: Set up your classroom from scratch. This option is not connected to an LMS, so you’ll need to manually roster students by entering their names or uploading a CSV file.
- Google Classroom Integration: Connect to your Google Classroom account. This option automatically imports your student roster and enables you to post assignments directly to your Google Classroom.
If you're creating a classroom from another supported LMS, you'll see additional options to select your LMS platform during setup. These options may include automated rostering and syncing features.
- Manual
- Google Classroom
Create a Classroom Manually
Enter Classroom Details
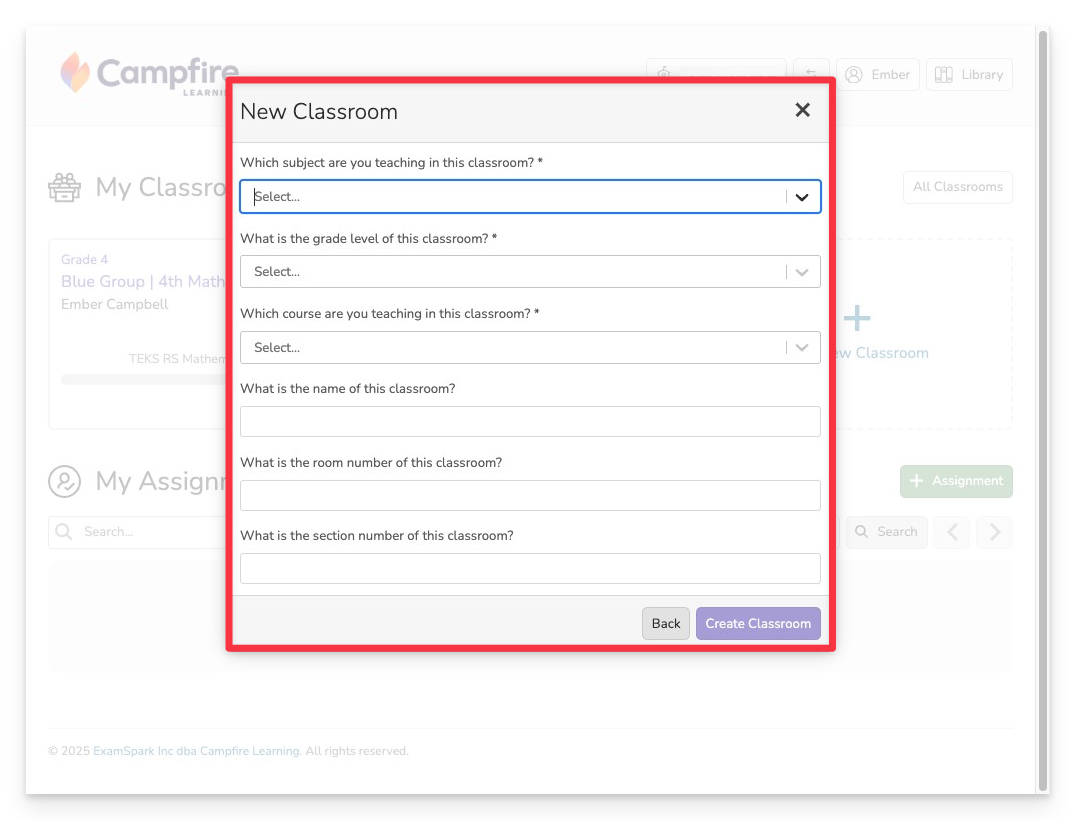
Enter the details that define your classroom’s structure and identity.
- Subject: Choose the subject (e.g., Math, Science).
- Grade: Select the appropriate grade level.
- Course: Pick the course aligned with your curriculum (e.g., 4th Grade Math).
- Classroom Name: Enter a name that will help you and your students recognize the class (e.g., “Ms. Johnson’s 4th Grade Math”).
- Room Number (optional): Add if you want to associate a physical location.
- Section Number (optional): Use this to distinguish between multiple sections of the same course.
Click Create Classroom to generate your new class.
Create a Classroom for Google Classroom
Connect to Your Google Classroom
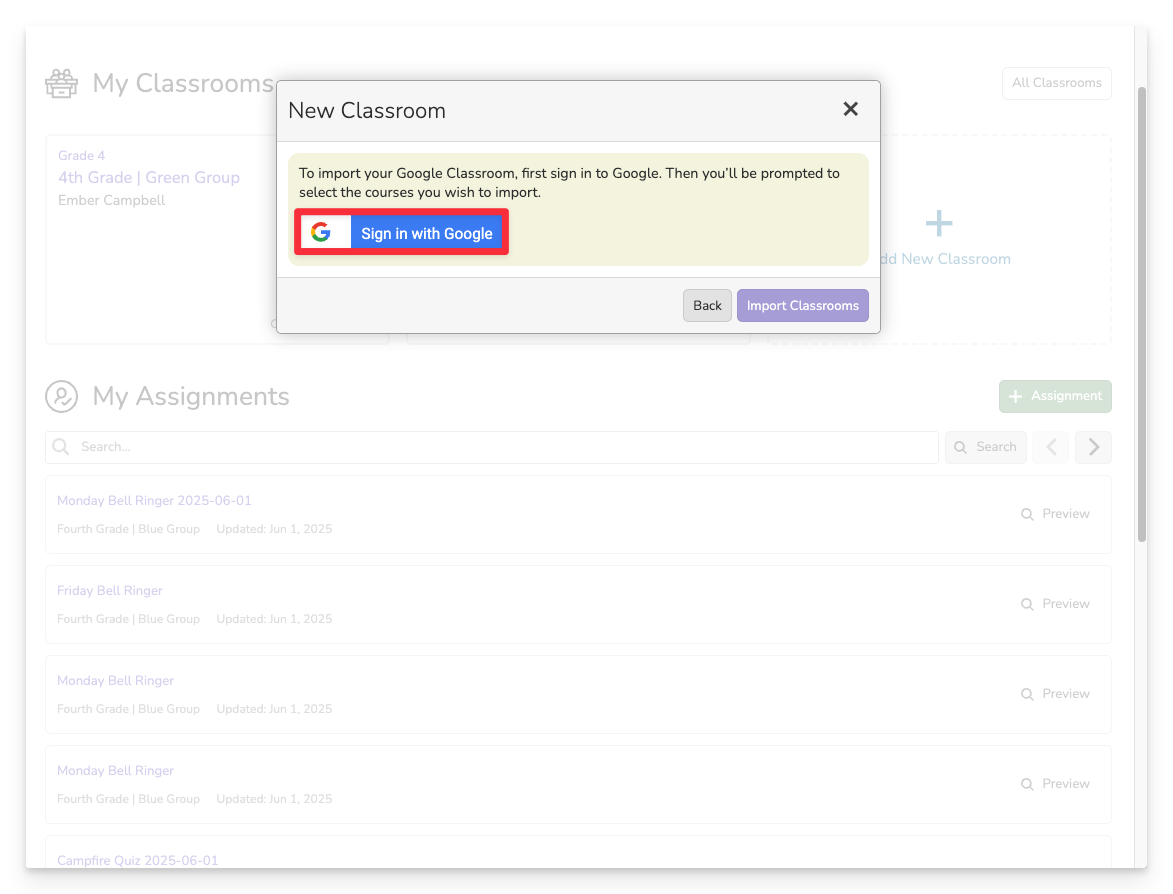
Sign in to Google account you use for your Google Classroom. A new browser tab will open to sign in with your Google credentials.
Select your Google Classrooms
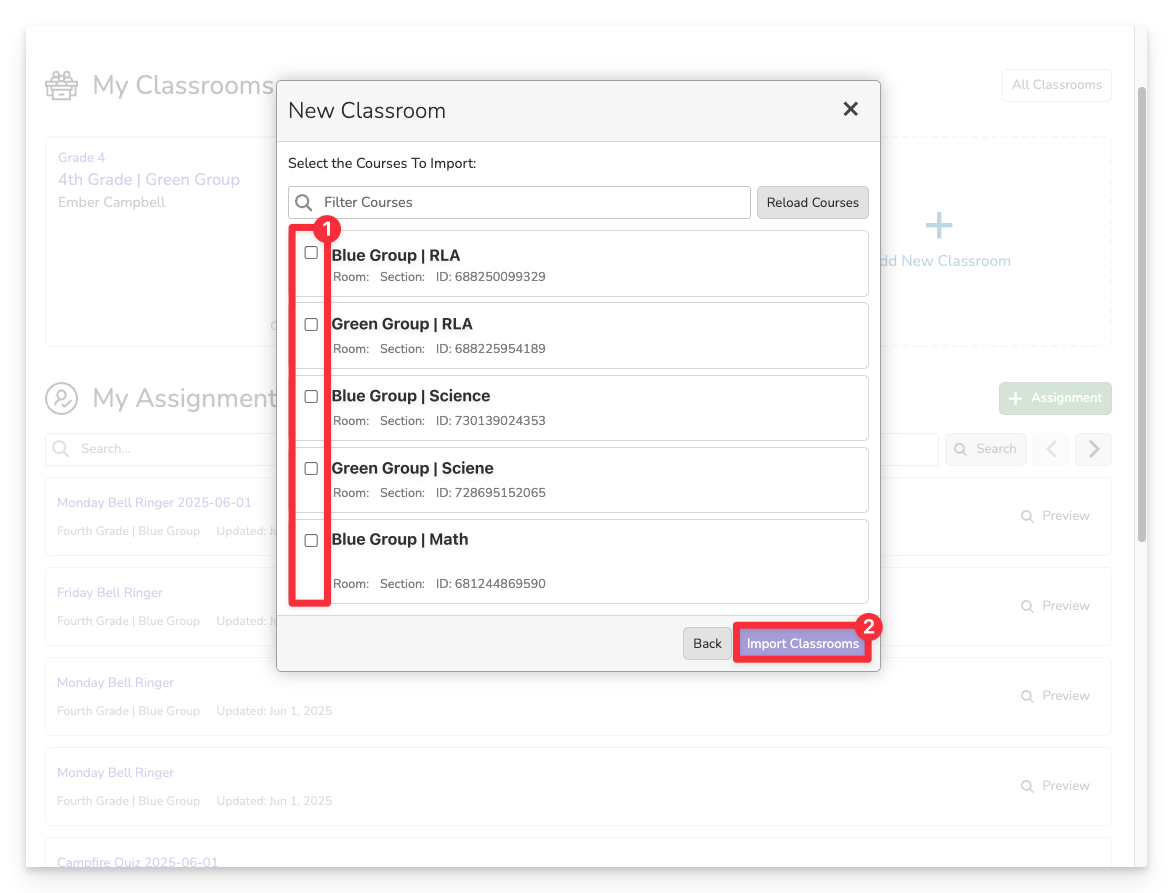
Once you’re signed in, your existing Google Classrooms will appear for selection.
- Check the box next to the class you want to connect to Campfire.
- Click Import Classrooms to sync the selected classes.
Your imported classrooms will now appear in your Campfire dashboard, ready for assignments and student tracking.
Remember, if you import your Google Classroom, you will not need to roster any students in the Campfire app.
Select Your Starting Unit
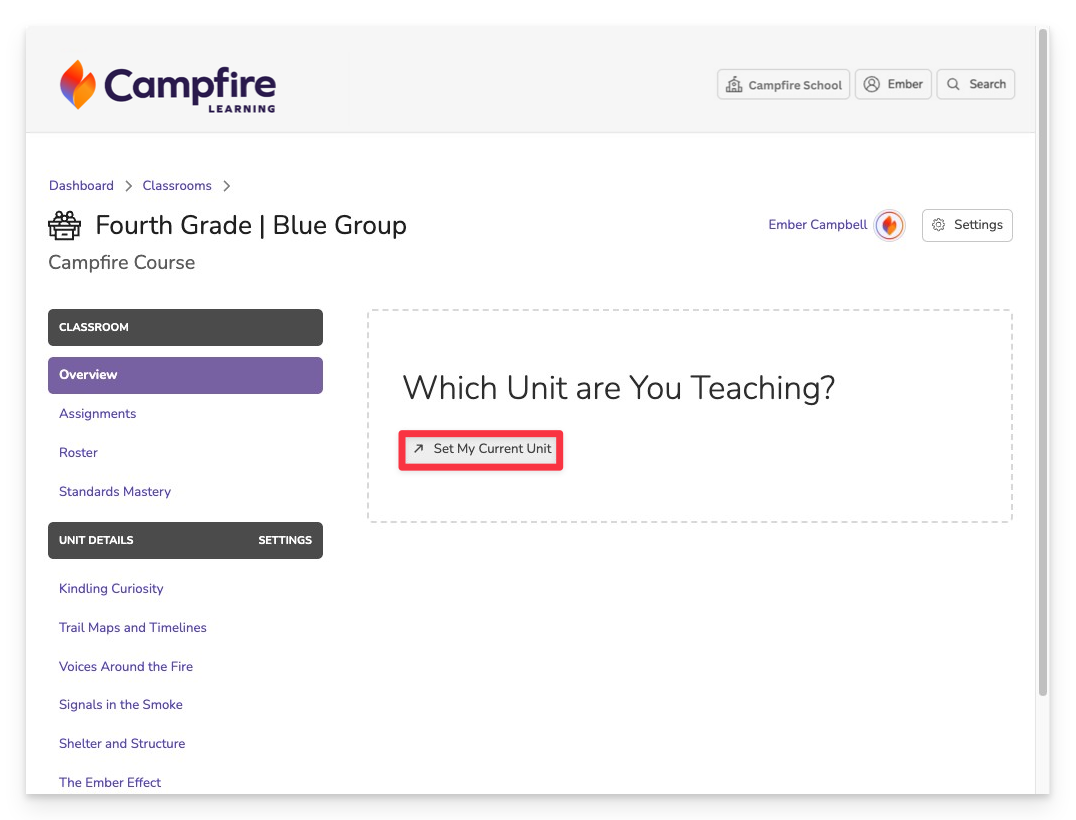
When you first enter your newly created classroom, you’ll be prompted to select the unit you want to begin with.
- Browse the list of available units for your course.
- Click Start on the unit you want to start teaching.
You can change or add units later from the Settings next to Unit Details.
Classroom Details
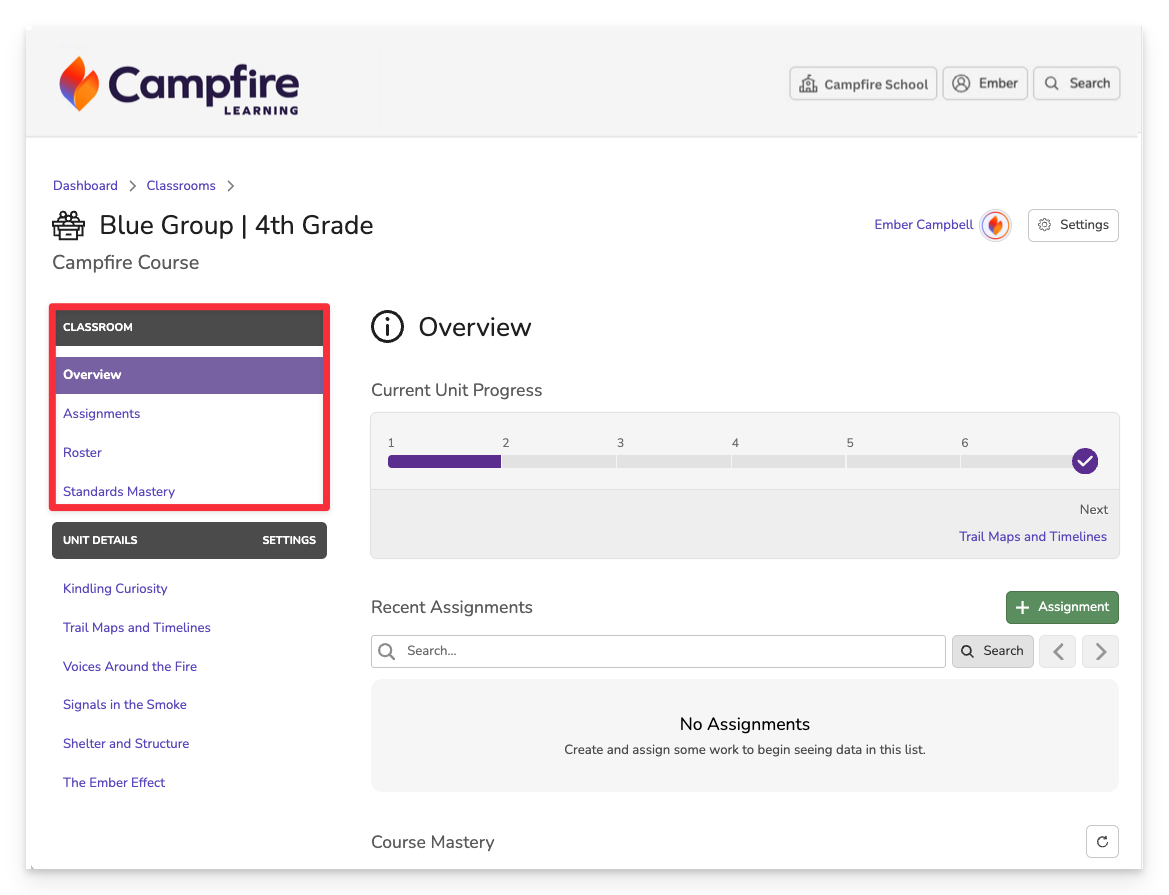
Under the Classroom tab, you have access to several tabs that help you manage, assign, and track student learning.
- Overview: View cumulative data across all assessments assigned in this classroom. This includes performance trends, participation, and mastery insights—regardless of unit.
- Assignments: See a full list of all activities assigned to this classroom.
- Roster: Add or manage students in your classroom. You can:
- Click to add students one by one.
- Upload a CSV file to roster students in bulk.
- Standards Mastery: Access a comprehensive view of standards-aligned performance across the lifetime of assessments in this classroom. This section helps track long-term learning progress.
Unit Details
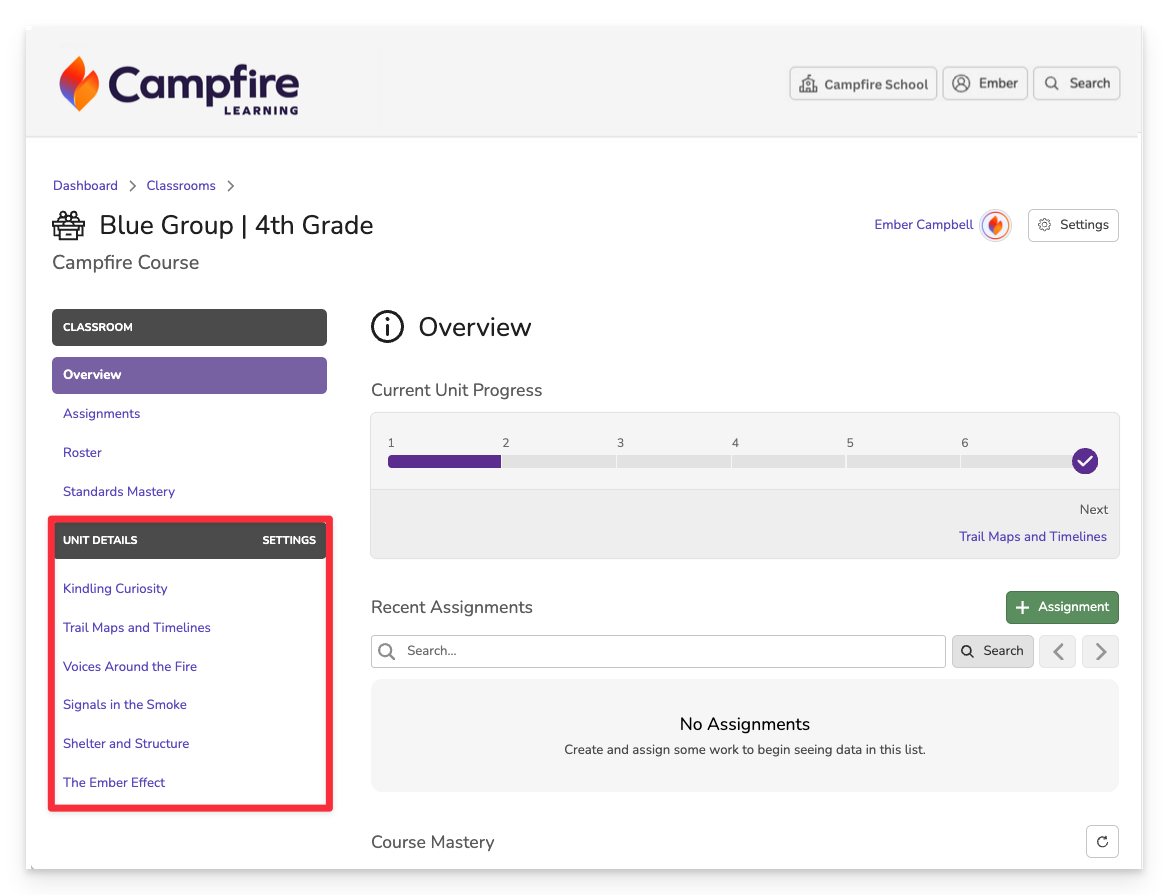
Under the Unit Details tab, you’ll find a list of all available units for the selected course.
- Click on any unit to view:
- A summary of the unit content.
- Any assessments tied to that unit.
- Classroom-level data specifically filtered for that unit’s assessments and student performance.
This view helps you focus on targeted instruction and progress within each instructional unit.
Tips for Managing Classrooms
- Editing Classroom Information: To update classroom details, navigate to the desired classroom, and click Settings. From here you can edit classroom information, reset the classroom, archive the classroom or delete it.
- Archiving Classrooms: At the end of a term or school year, you can archive classrooms to keep your dashboard organized.
- Reactivating Archived Classrooms: Archived classrooms can be reactivated if needed by accessing the Archived section and selecting Reactivate.